


Microsoft has recently released a new feature ‘Bookings with me’ in Outlook which is a web-based application that enriches you with a personal scheduling space for people to schedule a meeting or appointment. It also integrates with the free/busy information from your Outlook calendar.
Bookings with me is an ideal solution for enterprise, small business, and users in education to schedule 1:1 meetings with those inside and outside their organizations.
Here are few scenarios where how you can utilize “Bookings with me”. Please note that you can customize the time slots for each of a booking you schedule.
- Schedule interviews with external candidates
- Set up customer and client meetings
- Schedule tech support
Microsoft Bookings Vs Bookings with me
‘Bookings with me’ is nothing new but a personalized experience of the existing Microsoft Bookings App. Though these two variants share the same licensing requirements, they vary in the below aspects.
| Microsoft Bookings | Bookings with me |
|---|---|
| It is an independent Microsoft 365 application | It integrates with your Outlook calendar |
| It is intended to manage scheduling for a group of people | It can only be used for 1:1 meetings |
| For each new “Bookings Calendar” a corresponding mailbox is created in Exchange | It won’t create a new mailbox for each Bookings with me page |
Benefits of “Bookings with me”
Benefits of “Bookings with me” include :
✓ Customize your meetings to share with others
✓ People can schedule time based on your availability and preferences
✓ Both the parties will receive the invite via mail
✓ Convenience to update or cancel scheduled meetings
Pre-requisites
A user had to satisfy the below criteria to use the “Bookings with me” in Outlook.
✓ Microsoft 365 / Office 365 License
✓ Microsoft Bookings App to be assigned to the user
✓ Calendar FreeBusy Anonymous sharing must be enabled
How to enable Calendar FreeBusy Anonymous sharing
To check if it is enabled, use the below PowerShell command.
Get-SharingPolicy -Identity "Default Sharing Policy" | fl Domains“Anonymous: CalendarSharingFreeBusyReviewer” should be one of the domains in the response. If not, to enable it, use the below PowerShell command.
Set-SharingPolicy "Default Sharing Policy" -Domains @{Add="Anonymous:CalendarSharingFreeBusyReviewHow to turn-on / off “Bookings with me” using PowerShell
At Organization Level
To turn-on “Bookings with me”
Set-OrganizationConfig -EwsAllowList @{Add="MicrosoftOWSPersonalBookings"}
At User Level
To turn-on “Bookings with me”
Set-CASMailbox -Identity adam@contoso.com -EwsAllowList @{Add="MicrosoftOWSPersonalBookings"}To turn-off “Bookings with me”
Set-CASMailbox -Identity adam@contoso.com -EwsAllowList @{Remove="MicrosoftOWSPersonalBookings"}How to Create a new Booking
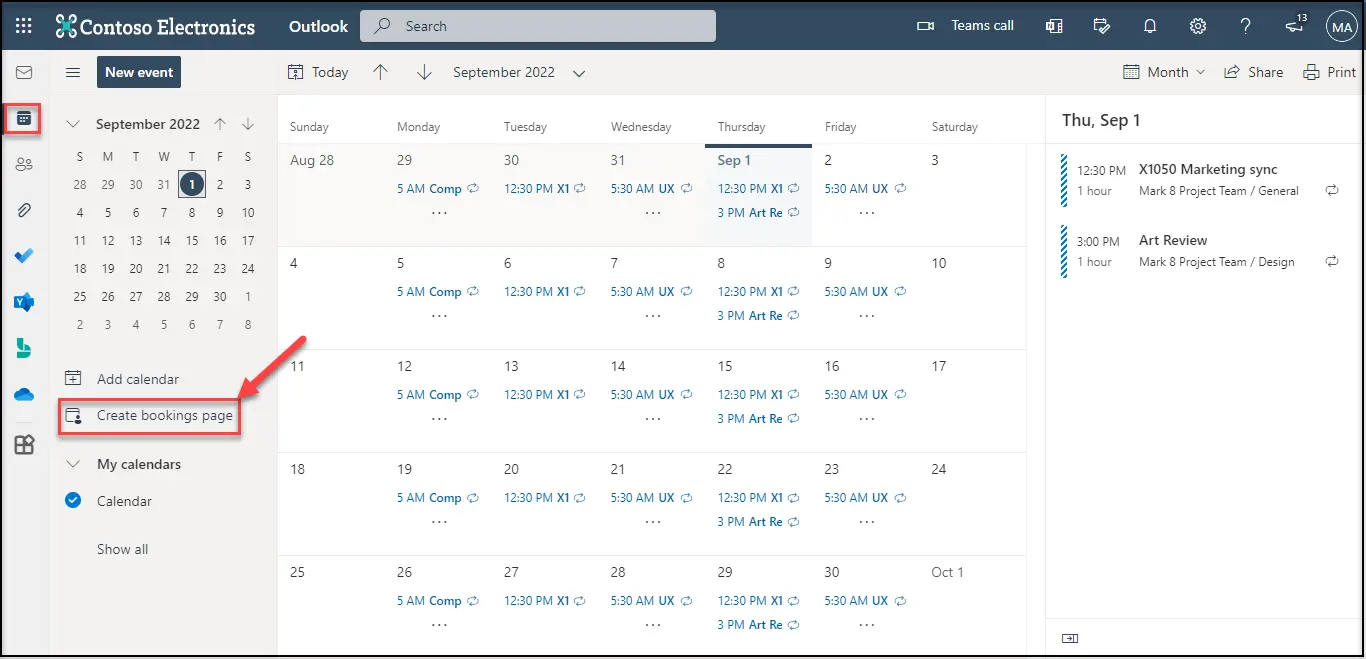
You can access your Bookings with me page through Outlook on the web whereas it is currently not supported in the desktop version.
Navigate to Outlook web view -> calendar -> “Create bookings page” option in left panel.
Bookings with me – Home Page [Organizer View]
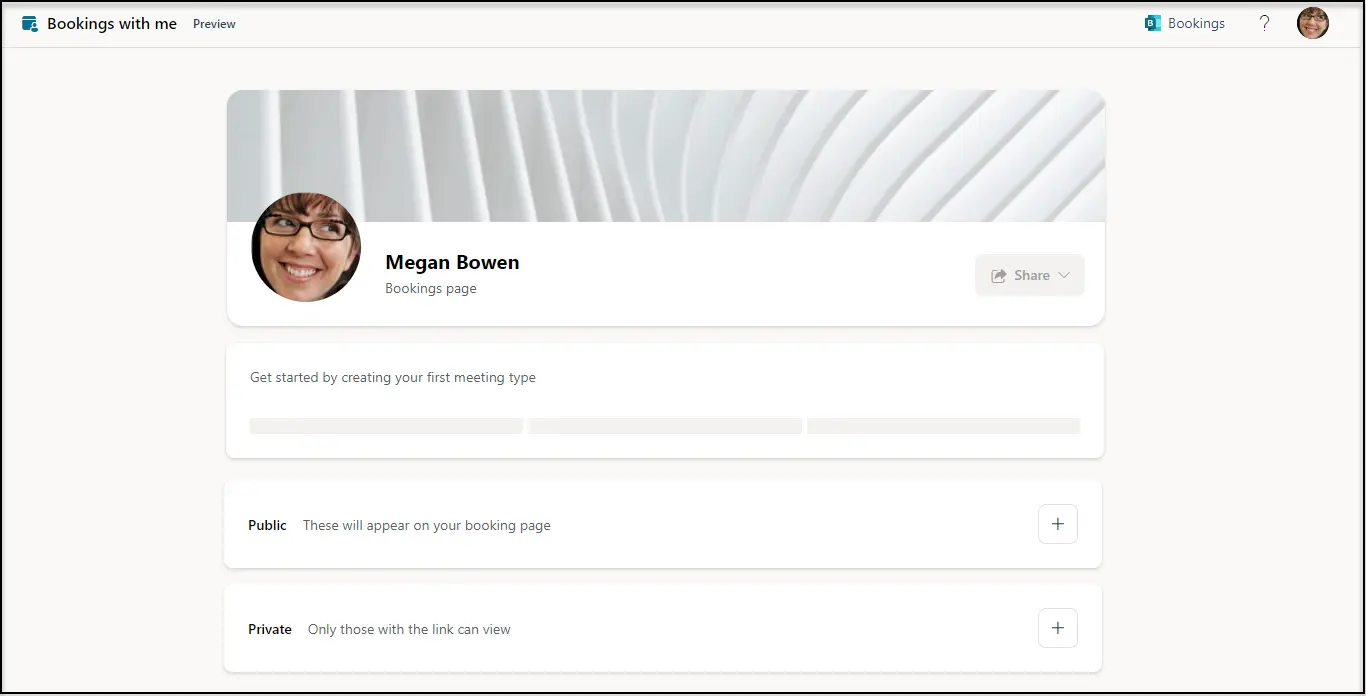
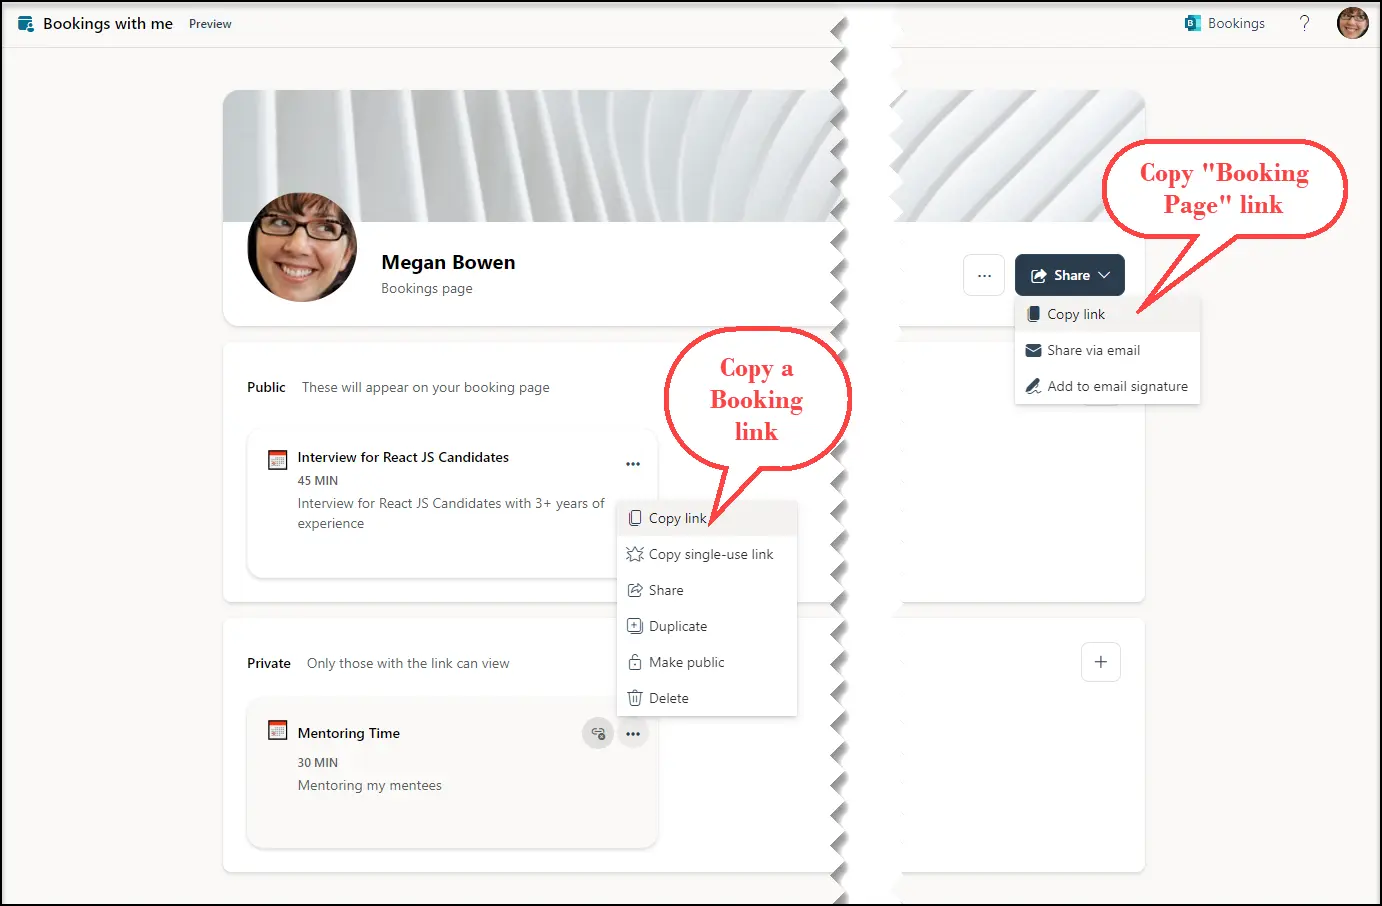
Step 1 : Choose to create a Public / Private Booking, fill the necessary information & ‘Save’. The Booking created is ready to be shared with others.
Note : When the “Teams Meeting“ option is enabled, a Teams Meeting link is shared along with the mail invite.

Step 2 : You can choose to share either the booking page link OR the booking link with others. You can share the booking link with the intended person & your job done.
Bookings with me – Attendee View
Attendee is not mandated with a Microsoft account to use Bookings app. The user can either sign-in with a Microsoft account or Continue as a Guest to access the Bookings app.
- If organizer has shared, “Bookings with me” page link : Attendee can view all the public meetings created by the user.
- If organizer has shared a meeting link : you’ll only be able to view that meeting.
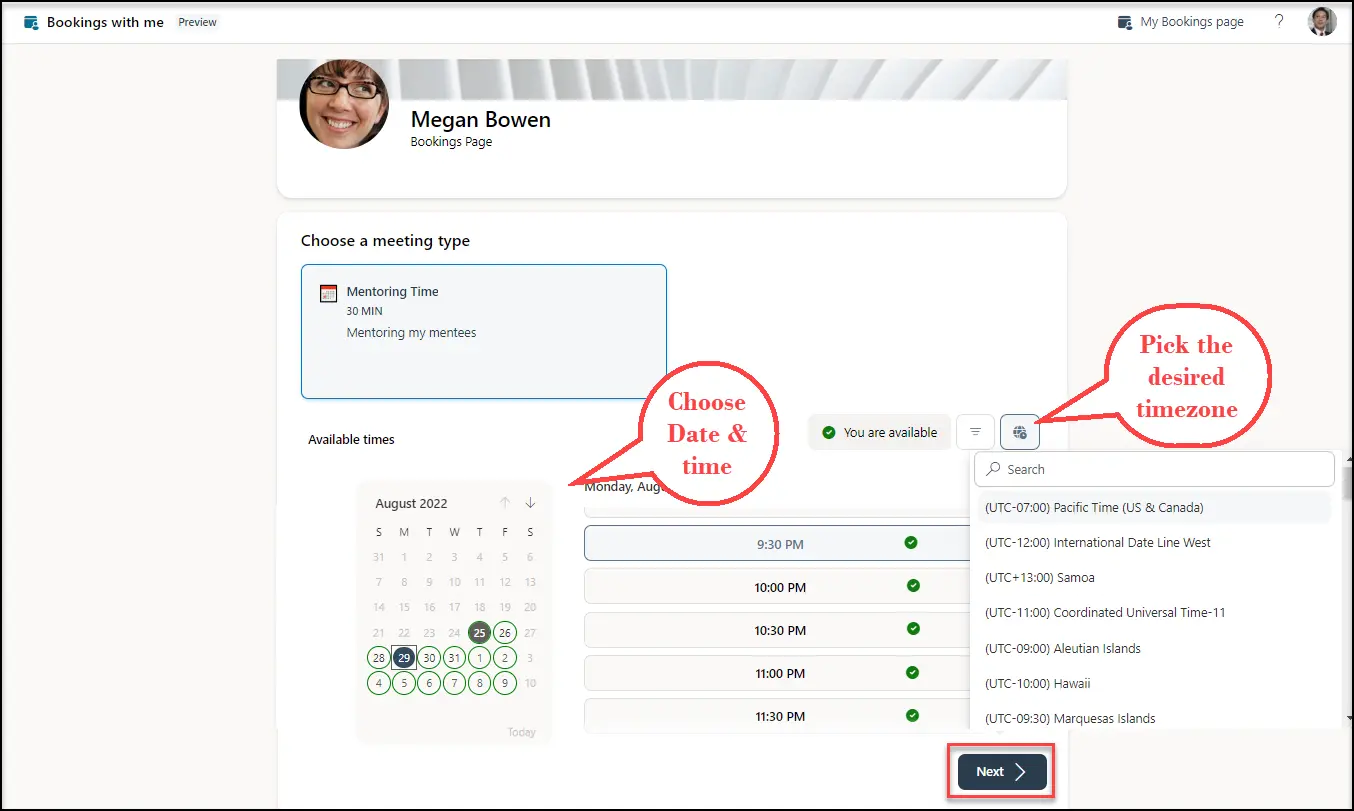
Step 1 : Choose a different time zone if required & choose the desired date & time. And then click ‘Next’.
Flow 1 : When you continue as a Guest
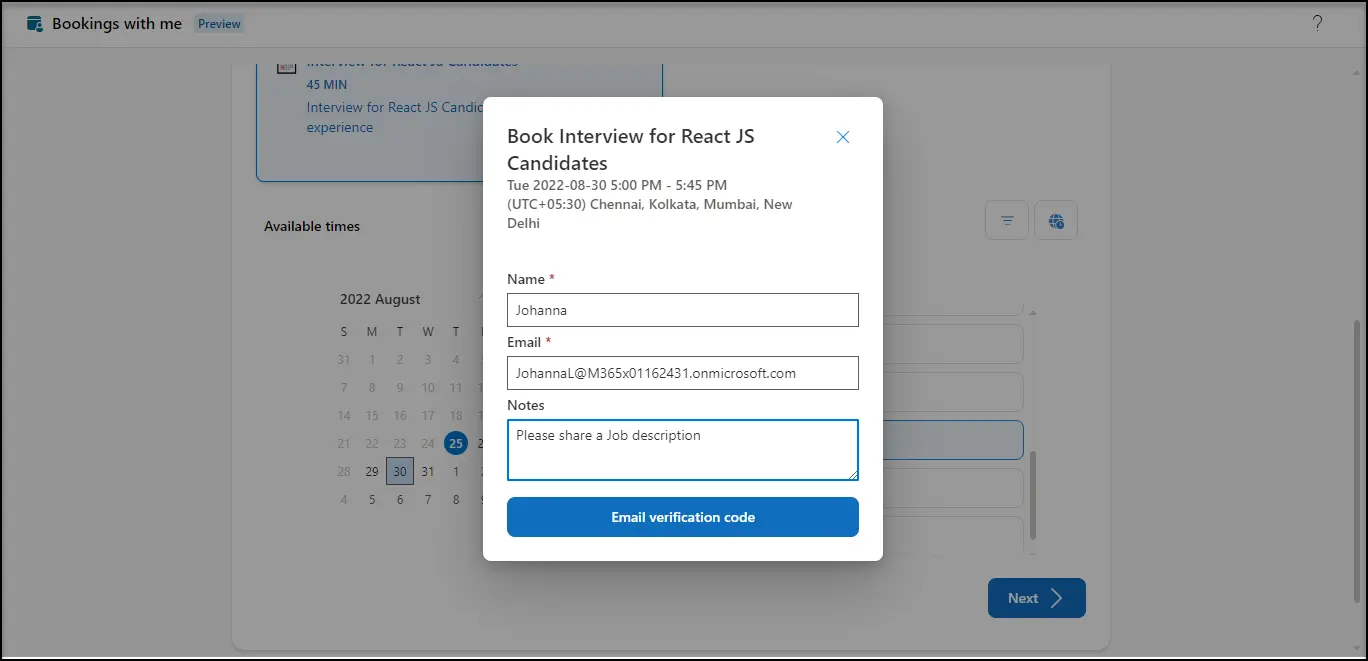
Step 2 : Enter the Name and Email to which the invite has to be shared. Enter “Notes” to add any custom message and click ‘Email verification code’.
Step 3 : Enter the verification code sent to the entered email in the previous step and click ‘Schedule’.

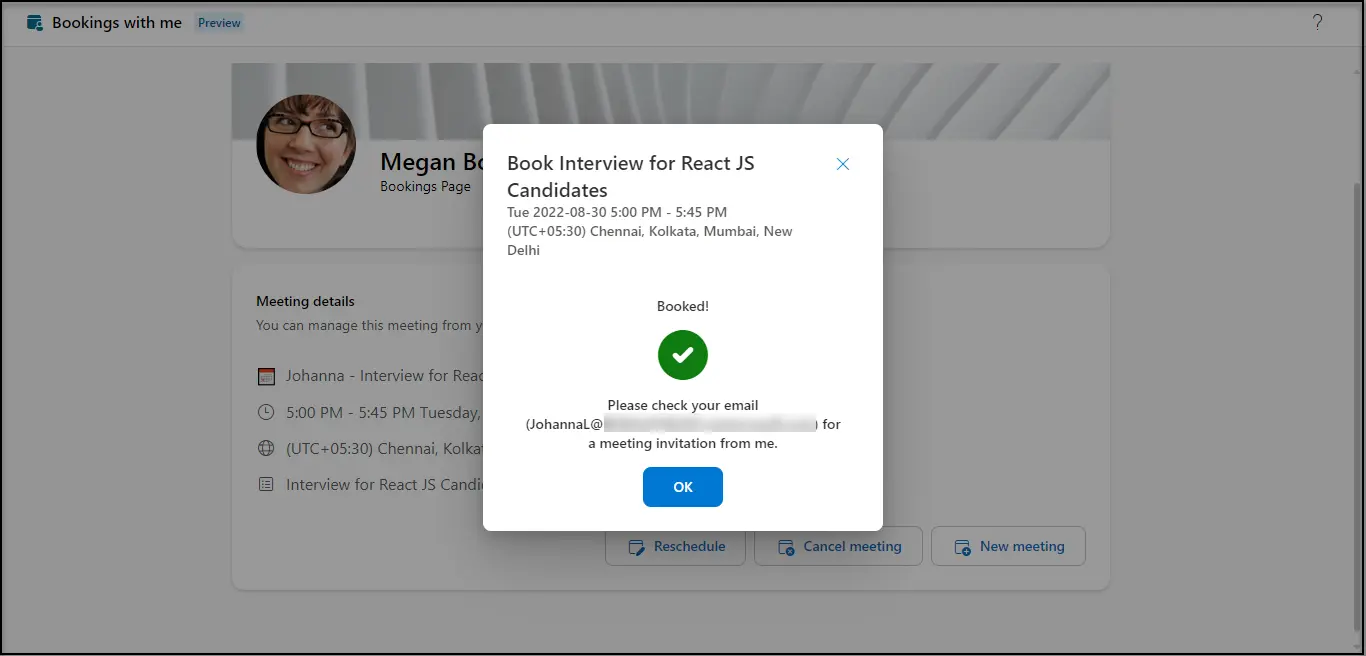
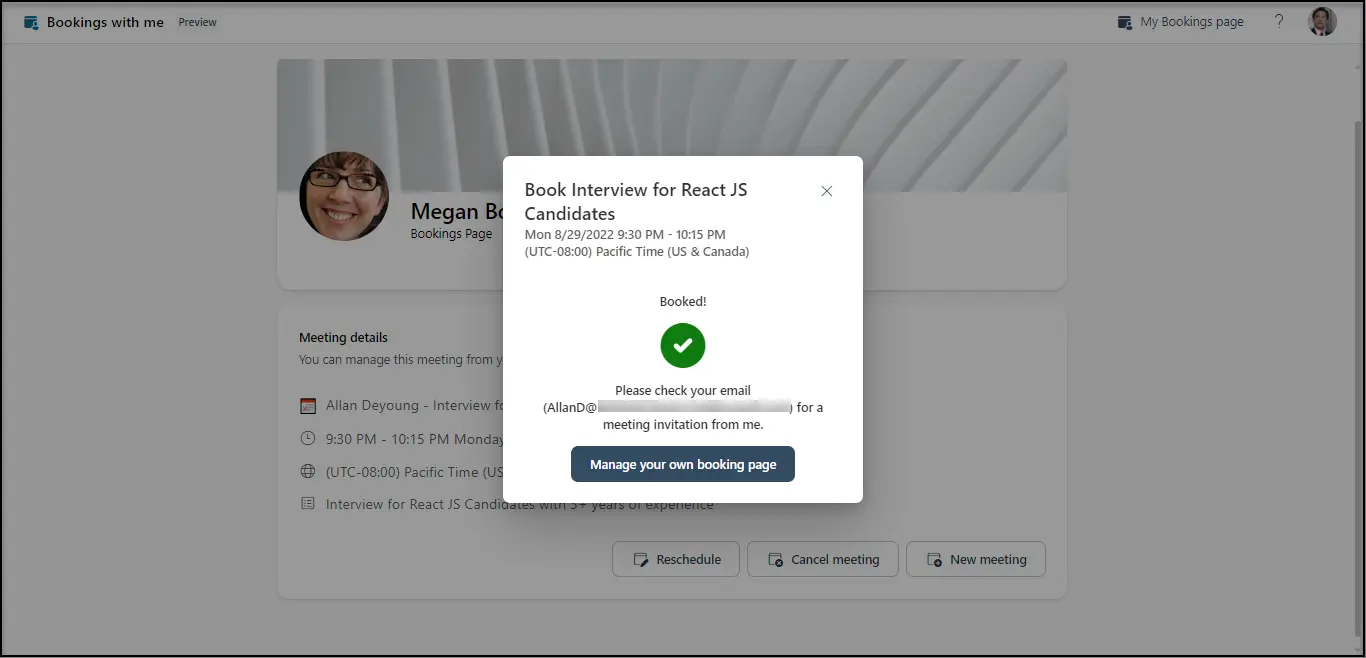
Step 4 : A booking confirmation page appears summarizing the details of the meeting just scheduled. Click ‘OK’.
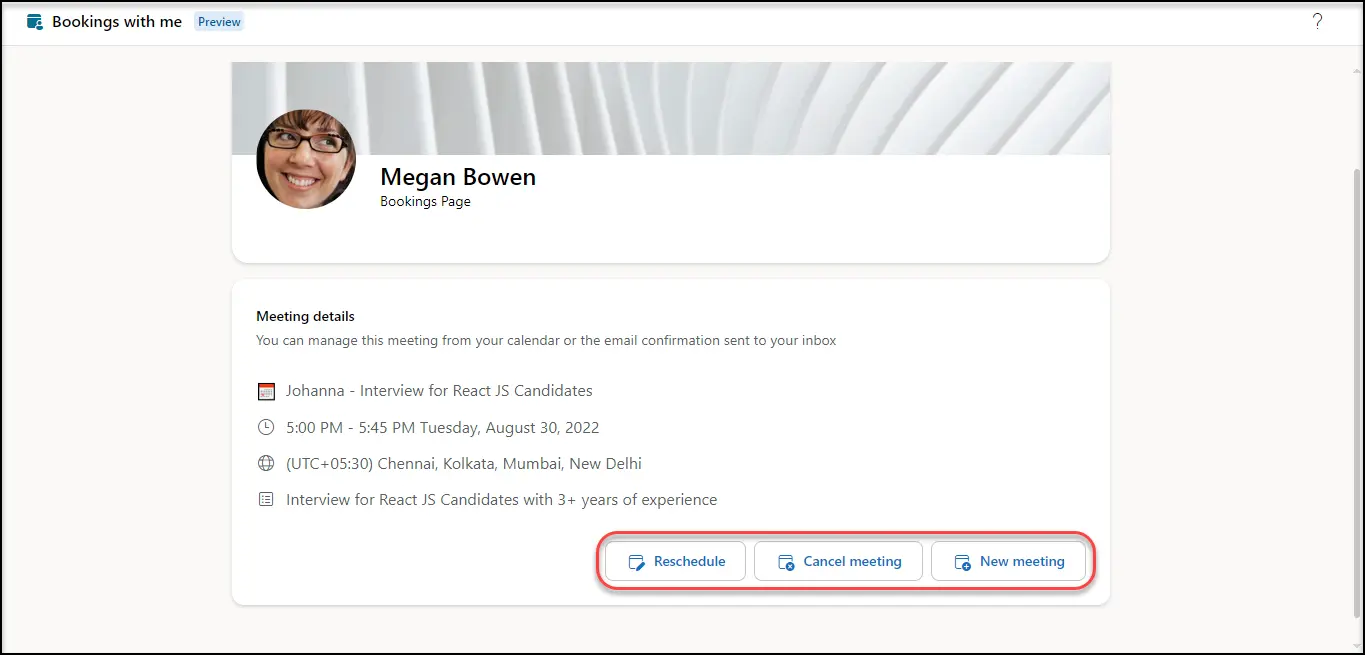
Step 5 : The Booking with me page is loaded with the meeting just scheduled. You even have the option to re-schedule / cancel OR schedule a new meeting. A meeting invite is also sent to the organizer + to the Email provided in Step 2.
Note : You can anytime manage this meeting from your calendar / the email confirmation sent to your inbox.
Flow 2 : When you sign-in with a Microsoft account
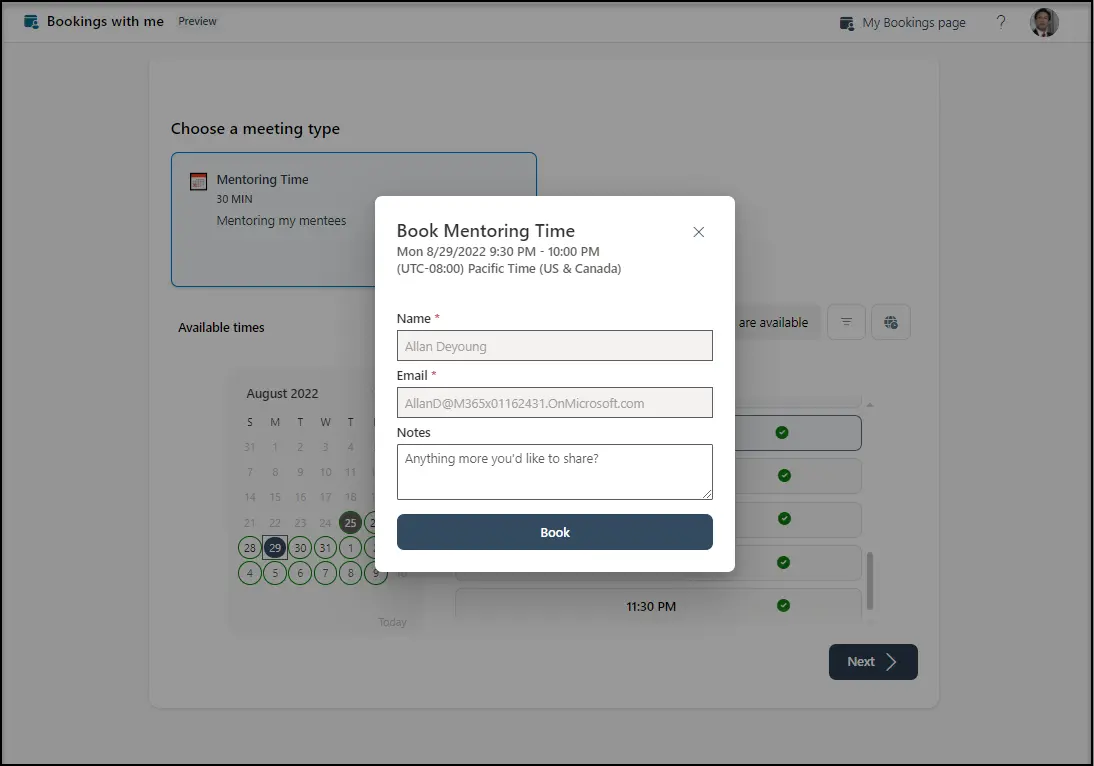
Step 2 : The details – Name and Email are auto-populated and disabled. Enter “Notes” to add any custom message and click ‘Book’.
Step 3 : A meeting is scheduled, and an invite shared to the organizer + user’s Email.
- On clicking ‘Manage your own booking page’, you are routed to your ‘Bookings with me’ Home Page.
- On closing this window, the “Bookings with me” page is loaded with the meeting just scheduled. You even have the option to re-schedule / cancel / schedule a new meeting. A meeting invite is also sent to you & organizer.
Note : You can anytime manage this meeting from your calendar / the email confirmation sent to your inbox.
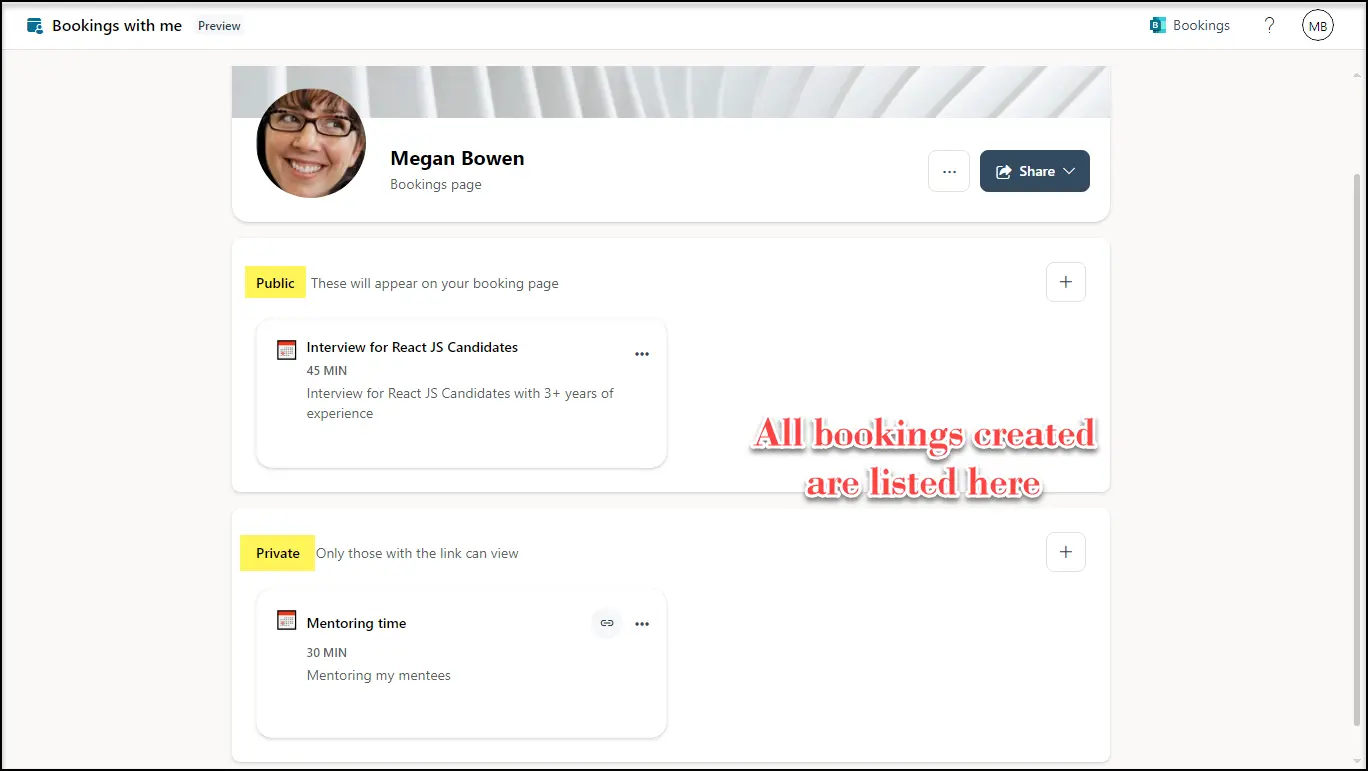
Bookings with me – Organizer View
To access the Bookings you have created,
Navigate to Outlook web view -> calendar -> “Edit bookings page” option in left panel.

All the public & private bookings created are listed here.


 Migrate
 Manage


 Migrate
 Manage