Microsoft has introduced a feature custom bookable time in Outlook to share with others so they can easily find a time to schedule a 1:1 meeting with you according to your availability and preferences.
Come-on ! let’s get our hands into it.
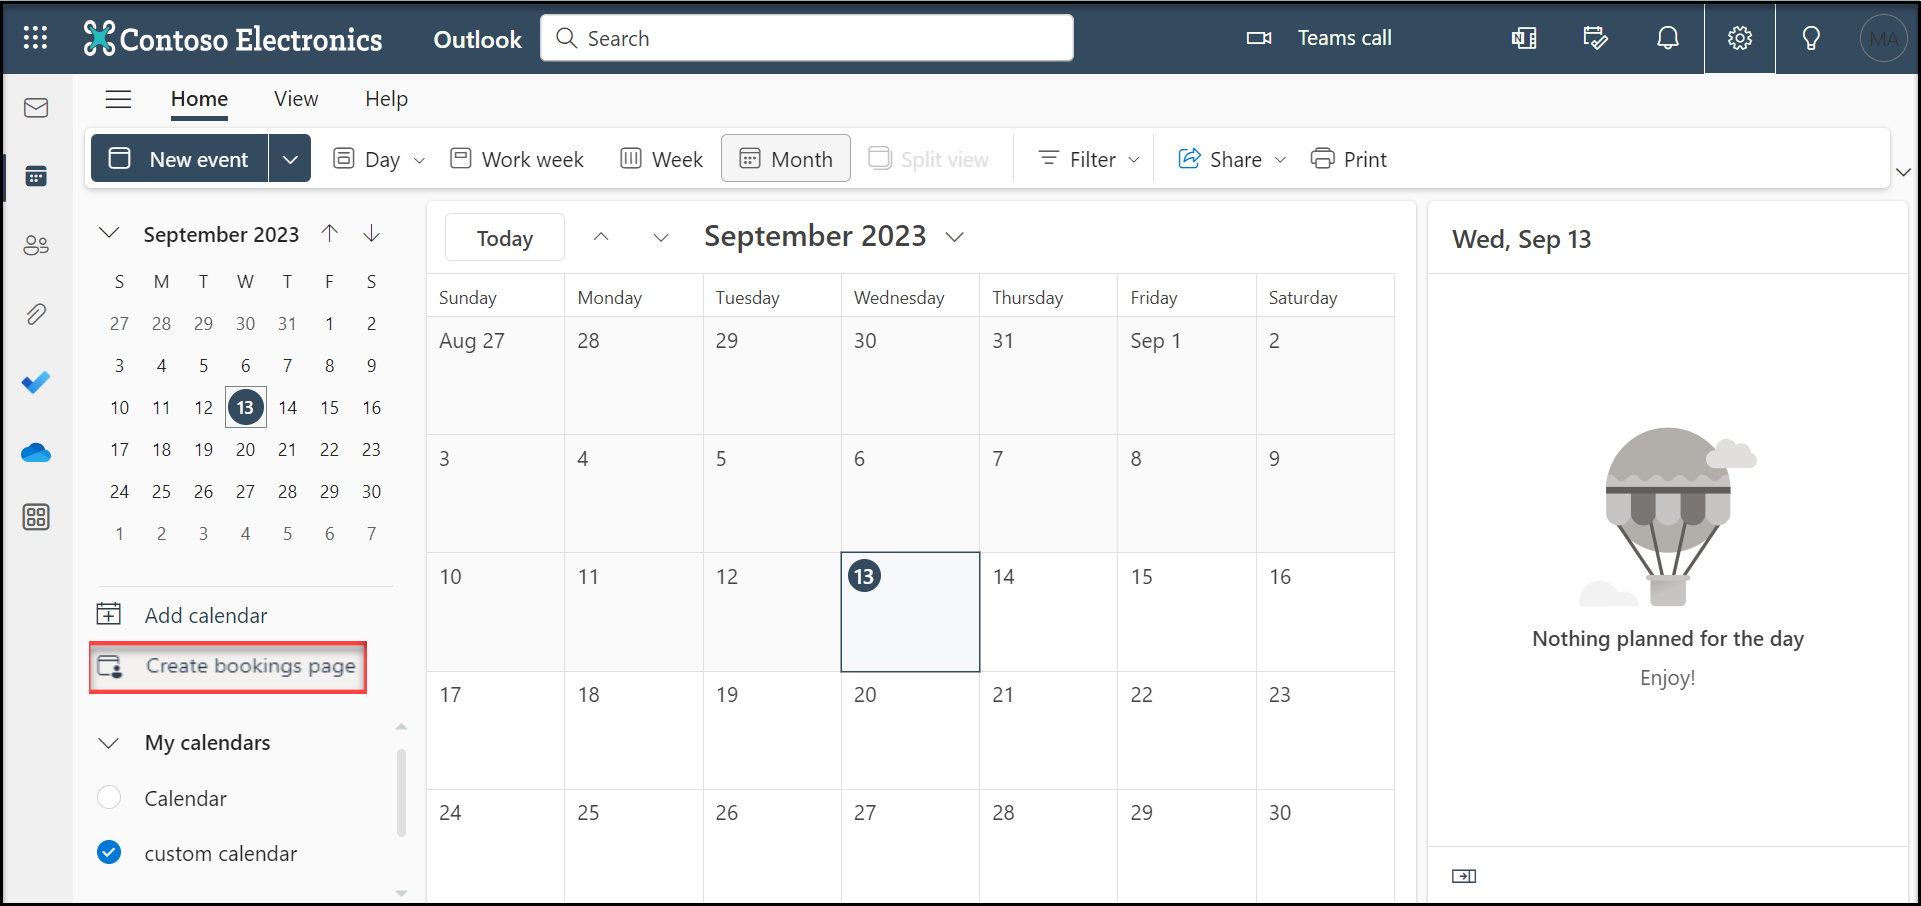
How to create a Custom Bookable Time?
We can create a Custom Bookable Time in 2 ways.
Via ‘New Event’ drop down in the Calendar Pane
By clicking on ‘Create bookings page’ in the left rail of Calendar Pane
In any of the above ways, try creating a Bookable time by providing the below details :
✓ Slot duration
✓ Availability – Available date and time for days of a week
✓ Privacy – Visibility of your Booking event
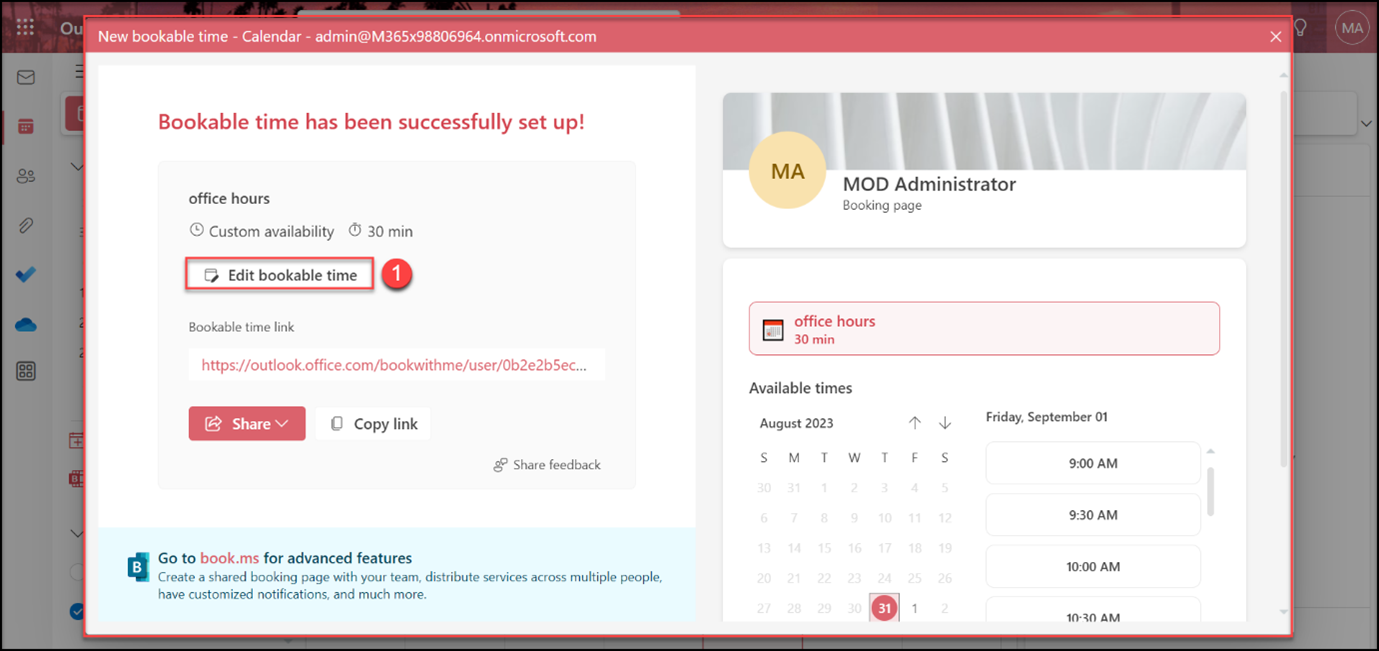
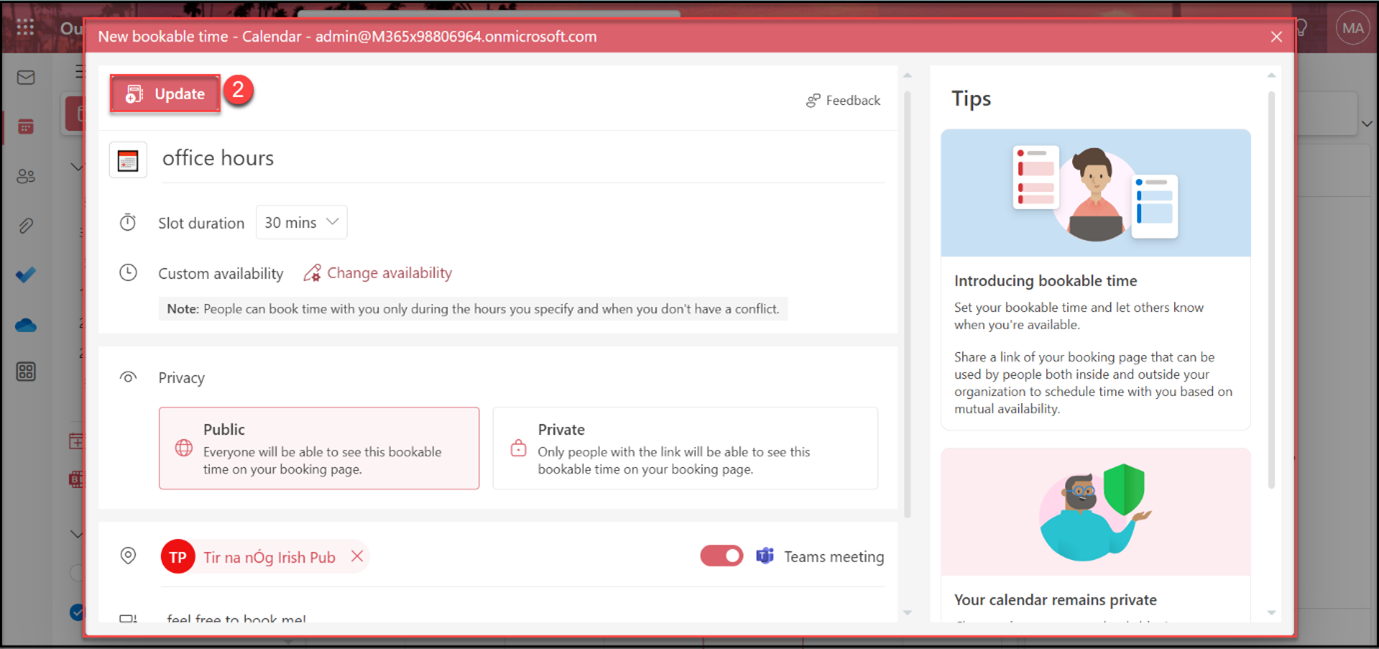
Edit Bookable Time
You can always go back and edit at a later point of time if the Booking needs any further changes as shown below
Share Bookable Time
You can share the Bookable time with your intended participants – could be either your colleagues or people from other organizations. We can do this in 2 different ways.
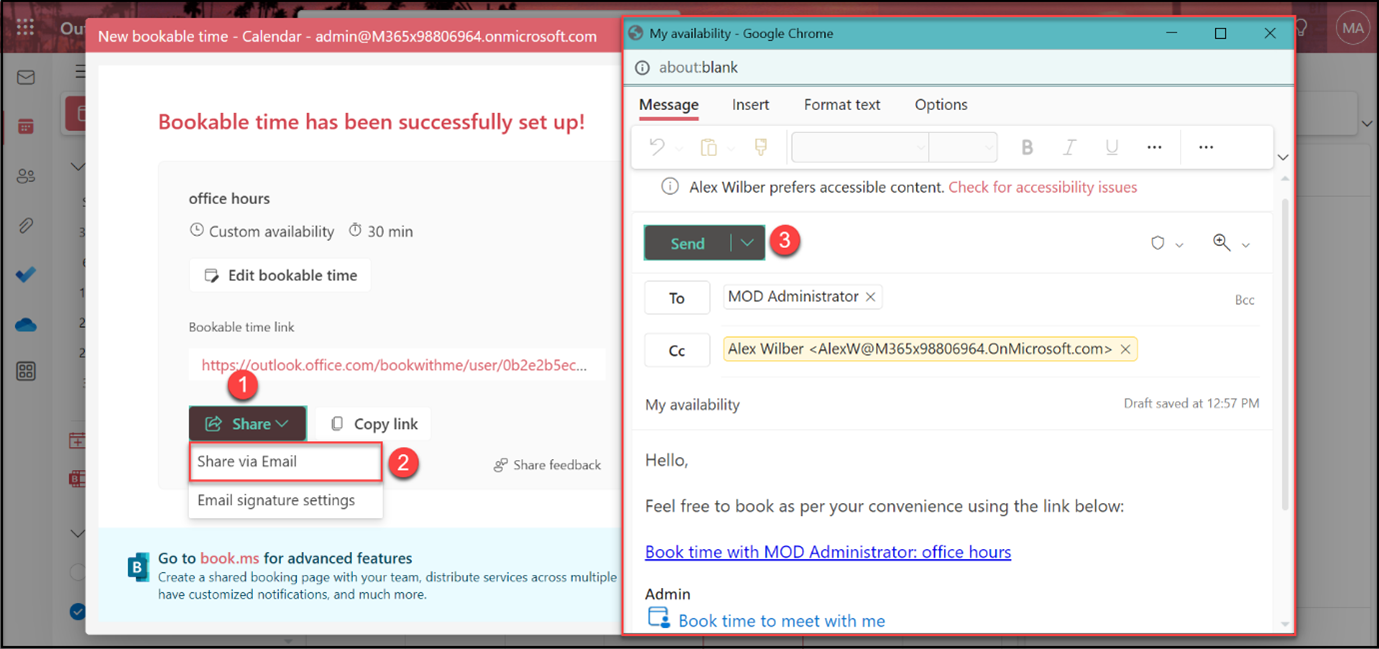
Share Via Email Step 1: In the create / edit Bookable Time window, click on option ‘Share’ at the bottom of the window. Step 2: Choose the option ‘Share via Email’ Step 3: Compose window appears Step 4: Enter the intended recipients, update the message if required Step 5: Press ‘Send’ to share
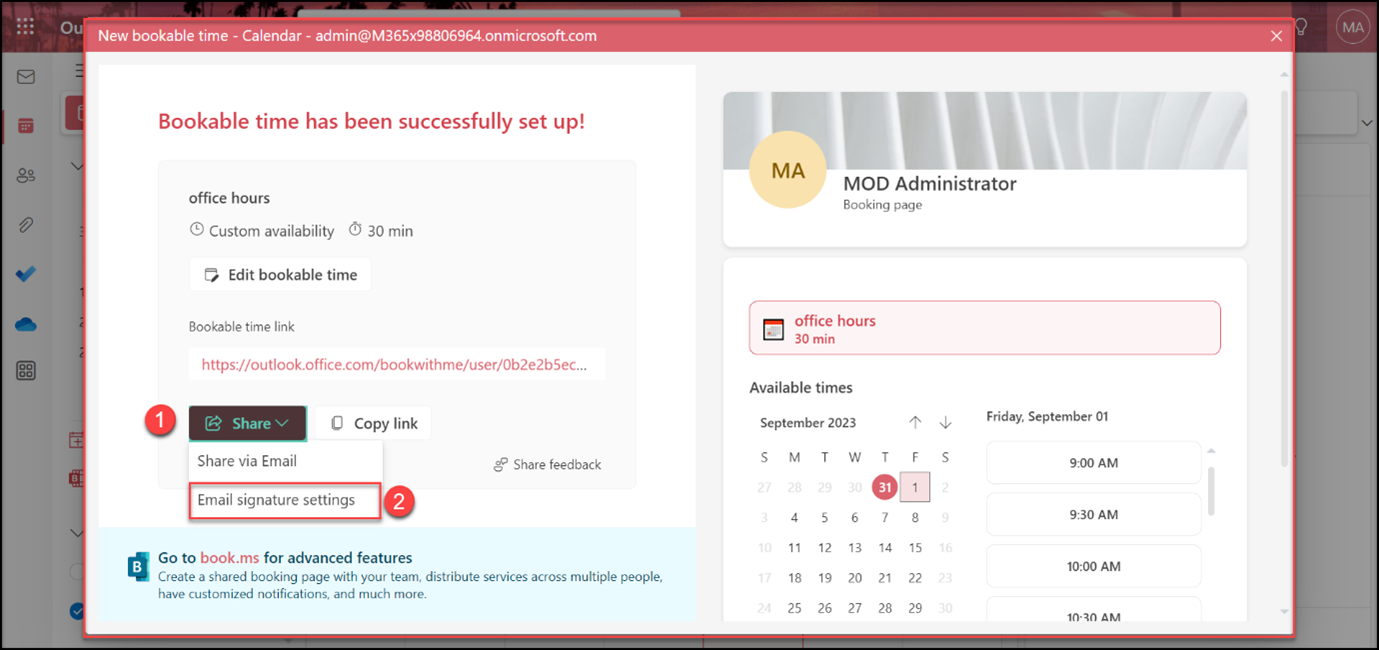
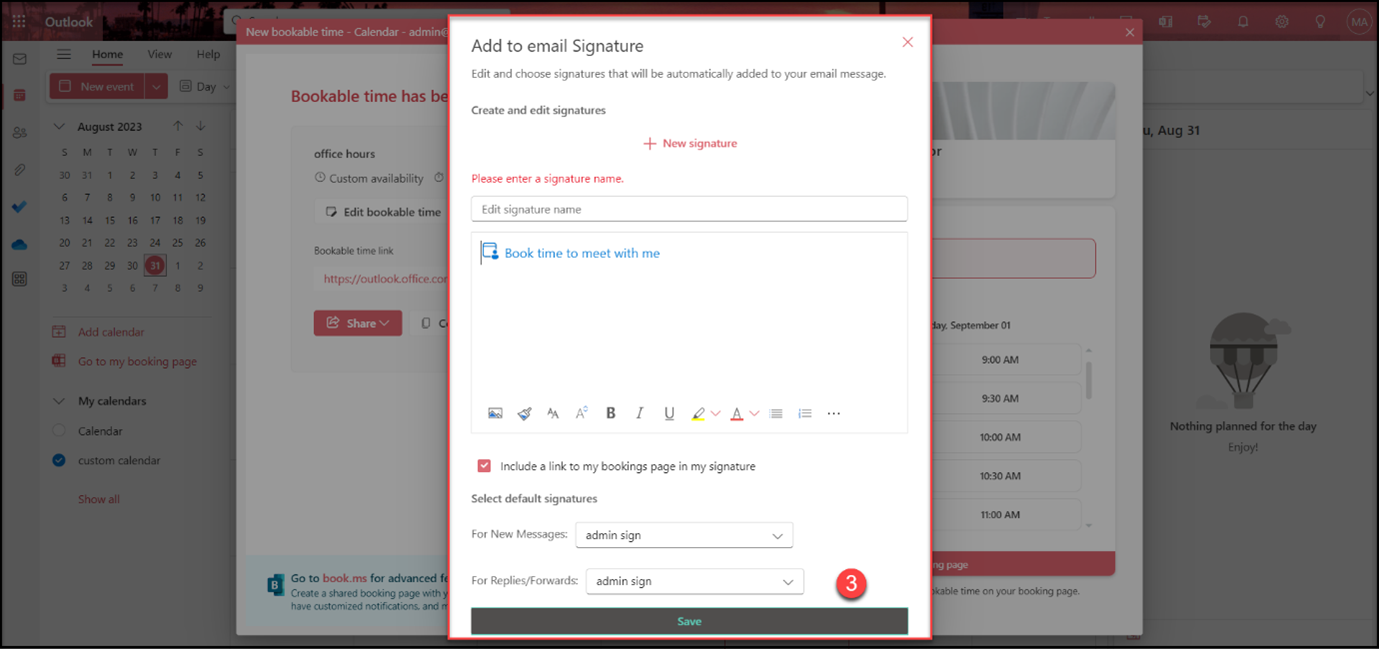
Share Via Email Signature Step 1: In the create / edit Bookable Time window, click on option ‘Share’ at the bottom of the window. Step 2 : Choose the option ‘Email signature settings’ Step 3: ‘Add to email Signature’ window appears Step 4: Add a new Signature or choose an existing one Step 5: Update the message if required Step 6: Press ‘Save’ for the Booking to reflect in your Signature
Copy Microsoft 365 environment between tenants without disruption. Apps4.Pro preserves data, users, and productivity before, during and after migration.
*We respect your privacy. We'll only send the info you requested - no spam, no promos, ever.
×
Your privacy matters.
We use cookies to ensure secure functionality, analyze performance, and personalize your experience. You control your preferences at any time.
Your Privacy First. Always
Apps4.Pro uses four types of cookies as described below. You can decide which categories of cookies you wish to accept to improve your experience on our website. To learn more about the cookies we use on our site, please read
Our Cookie Policy
Manage Consent Preferences
Necessary
Required for core site functionality and security.
Analytics
Help us understand usage and improve performance.
Marketing
Enable ads and campaign measurement across channels.
Preferences
Remember settings like language and display preferences.