
Microsoft Planner offers you a lot of features, which make your tasks an easy to manage routines.
But it misses out some features. For example, you can not post comments to @tag a member in the comments section of a task.
It does not support it for now and you can confirm it by following the below link from Microsoft Support
In the present form of the Planner, all the assignees in the task, who comment in the comment section of a task will receive the mail notification.
But most of the assignees, would feel it as an avoidable interference if the notification is insignificant to them.
Similarly, the assignees who have not put any comment in the comment section have to revisit it for any notification.
Here comes the simple and perfect use of @tag. You can notify a particular assignee by using the @tag and it simplifies the work of all the concerned people.
And it will be more useful for an assignee who works in multiple tasks in a team. He / She could get the notification without having to open the planner tab each time.
Wunder365 for Office and how to @tag in Microsoft Planner
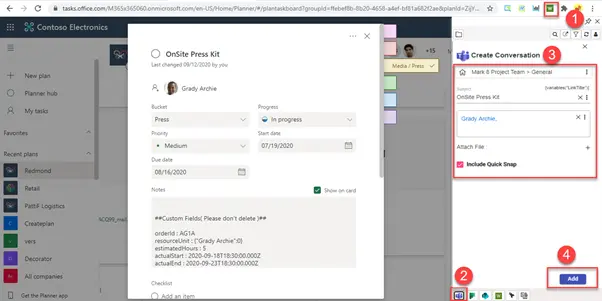
Open your Wunder365 extension from your browser.
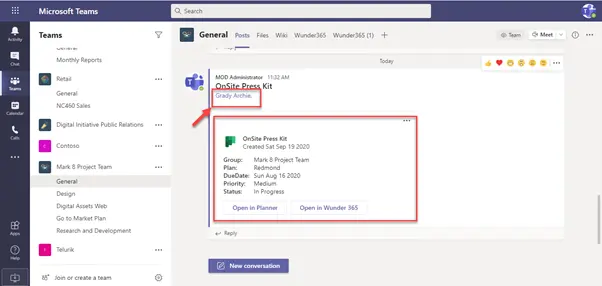
Now you can post the teams conversation from the Planner and you can @tag a member you prefer as shown below.
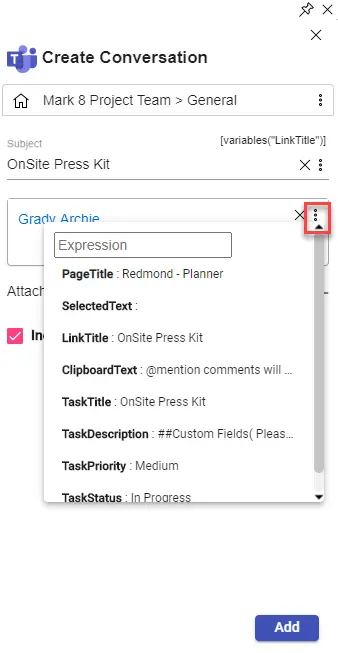
And Wunder365 for Office also provides a macro that makes your work easier. You can see some of the options in the macro in the following image.
Wunder365 for Office also enables you the uploading of files from your computer, clipboard and you can take screen shot also.

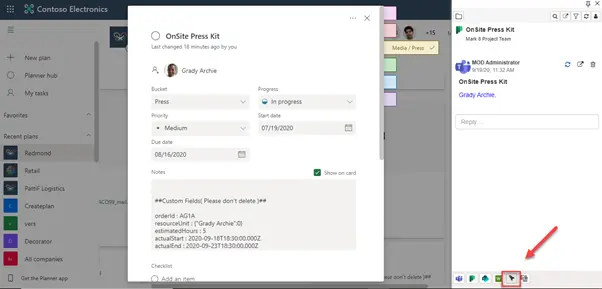
And you can comment by using @mention directly in the add-ins as shown below. Selecting the ‘Include Quick Snap’ option enables you to post the message as a snap.
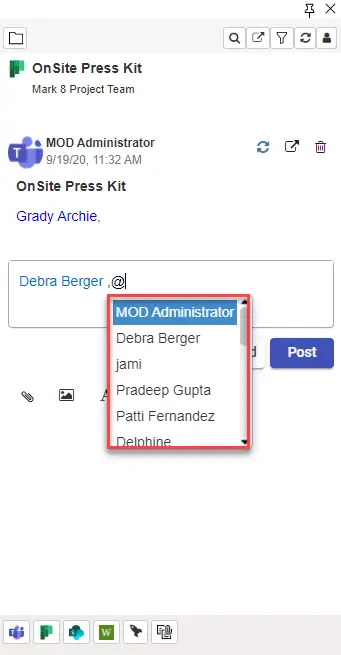
The posted message in teams is shown below. And you can do it in Planner, Outlook and OneNote add ins also.
Wunder365 for Office Templates:
In situations where you must repeat the messaging, you can do it by using the template option provided in Wunder365, which simplifies your task.
You can create your own template by using the template icon as shown in the below image.
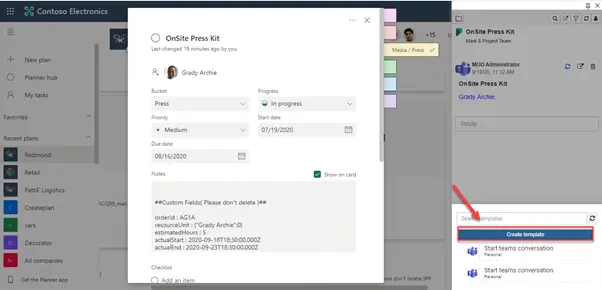
When you click the template icon, you will get the window as shown in the following image with ‘Create Template’ tab.
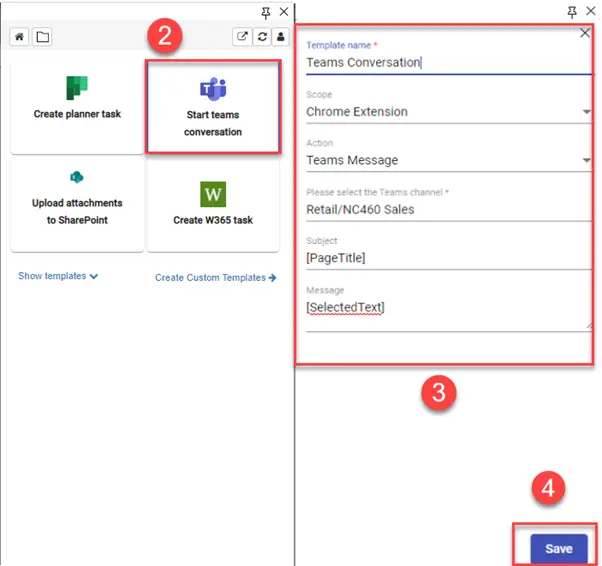
Select the ‘Create Template’ tab and you get the window shown in the following image. Select any of the option you need to create a template.
Here, “Start Teams Conversation’ is shown as an example and you can fill the required details in the pop-up window to create a custom template.
After creating templates, you get the list of templates in the template icon as shown below. You can choose the one you are in need, and you can use it to ease your work.

Get the Wunder 365 App & Use the features not available in Microsoft Planner
Try it for FREE now!
You can try the free version for 15 days and get to know the usefulness of this reliable app. It is a product of Jijitechnologies, a Microsoft certified professional company!
For more details visit https://www.wunder365.com/wunder365-for-office
For further enquiries, mail us and we are waiting to answer you.
Sales:
sales@jijitechnologies.com
Support:
support@jijitechnologies.com