
In this blog, I will detail you “how to create bucket templates in
Planner” and it’s a requested feature for Microsoft Office
365 Planner users. Apps4.Pro’s Planner Manager app is available in
the Edge and Chrome web stores as an Extension. You can
add our extension and effortlessly start creating bucket templates in
Planner.
Many of these projects comprise of recurring buckets. This creates the
need for the team to use the set of tasks to create a new plan. It is a
burden for the manager to create a new plan with the same set of buckets
again, and again
Apps4.Pro Planner Manager offers the feature to
save the set buckets from any existing Plan in your Planner as a
template.
This template can be used when creating a new Plan or import
to the existing plan. Creating a template is a one-time action. Once
created, you can re-use it any number of times to create bucket
templates in the Planner. Thus, it helps you to save time.
Now let’s jump in and see how it works.
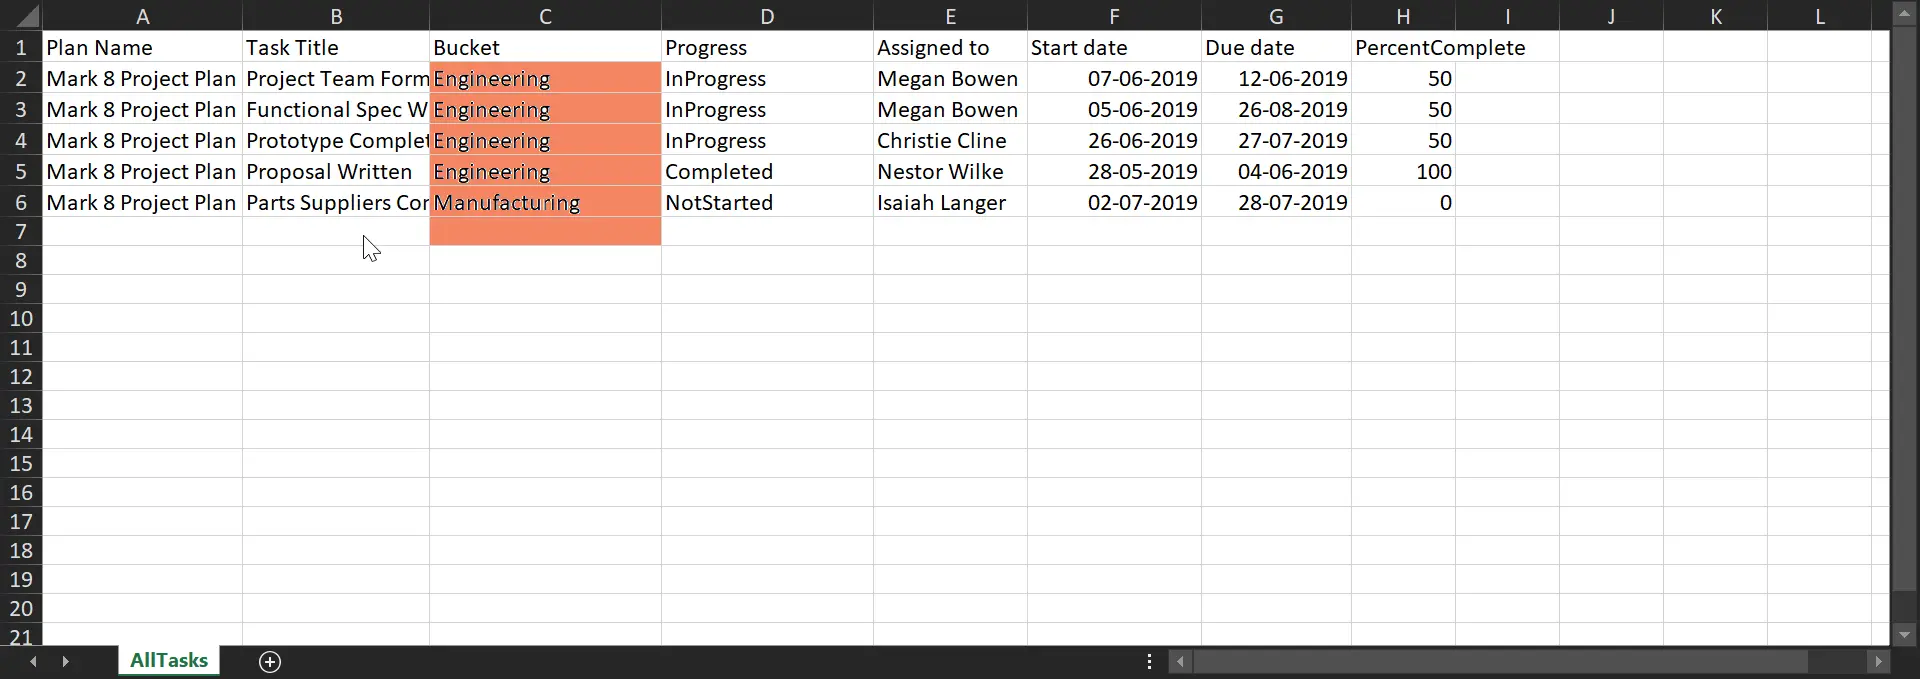
STEP 1: Apps4.Pro Planner Manager allows you to view all the tasks &
plans in the group you are a member of. You can filter the tasks by the
“Buckets” column and select the task you want and export it as an excel
sheet.

STEP 2: Now you can able to create bucket templates by modifying the
bucket name in excel and import it to any plan you create by using the
add-in Apps4.Pro Planner Manager.
For more details visit https://apps4.pro/planner-manager.aspx
Reach out us at the following email address for more help.
Sales@jijitechnologies.com
Support@jijitechnologies.com