Enterprises use Private Channel in Microsoft Teams for select people collaboration inside a Teams team. Private Channel provide true privacy, only channel owners and member can view/edit the channel conversations and content. With the release Private Channel, adoption of Private Channel raised and there by reduced the number of teams created for same project.
Typical use case for Private Channel is to discuss costing / team appraisal with select set of project managers in that team, we can’t have these information available to all the team members.
As an IT administrator, it is necessary to have better understanding of Private Channel architecture for maintenance and migration.
In this blog, we are going to explore
- Microsoft Teams Private Channel architecture
- How to migrate Private Channel using Apps4.Pro Migration Manager
What is Microsoft Teams Private channel?
Private Channel is another kind of channel in a team, by default team members can create Private Channel and make the existing team members as Private Channel members. You can’t make people outside the parent team as owners/members of Private Channel.
Private Channel Architecture
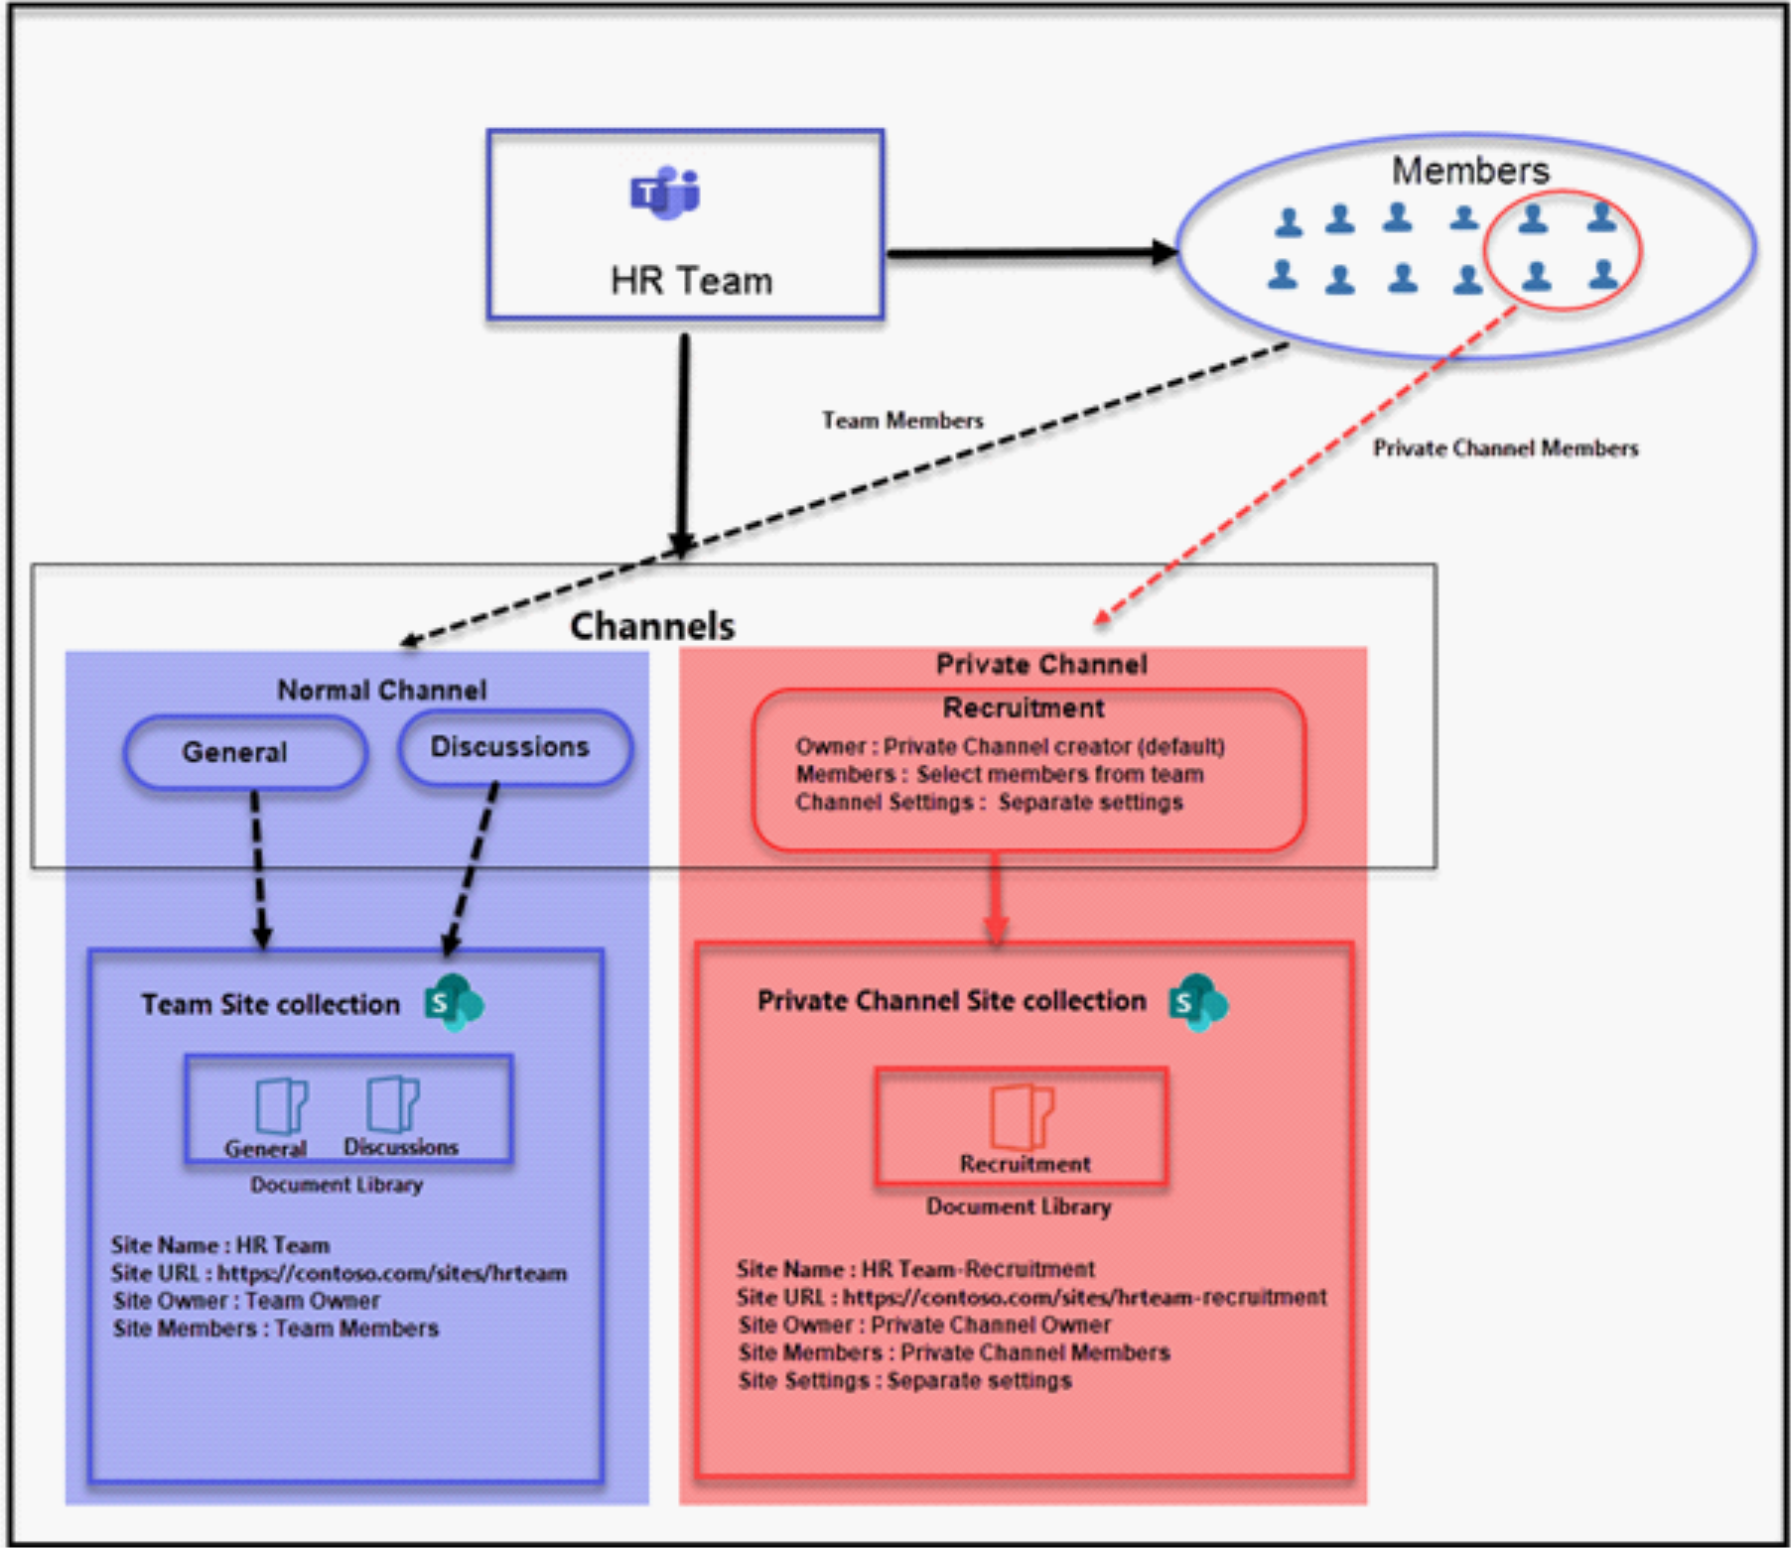
In standard team channel, a folder is created for each channel in the team’s SharePoint Online site collection. Microsoft Teams provides true privacy for the Private Channel, so it is designed with
- Separate SharePoint Online Site Collection for each Private Channel.
- Separate owner and team members for each Private Channel.
- Site Collection owner and members are mapped to corresponding Private Channel’s owners and members.
Independ Private Channel that settings does not depend on team settings.
Only the private channel owner and members have access to the channel conversation and site collection, other team members don’t have permission to access the conversation and files. This true privacy applicable for the team owner also, if the parent team owner is not a member of the private channel, then the team owner doesn’t have access to the private channel site collection and conversation
How to migrate Private Channels in Microsoft Teams
Currently, Microsoft does not support teams migrate from one tenant to another tenant. Few month back Apps4.Pro Migration Manager supported the teams migration, now Apps4.Pro Migration Manager supports private channel migration.
What we can migrate in private channel using Apps4.Pro Migration Manager
Apps4.Pro Migration Manager migrates the following in private channels migration.
– Private channels owner and members
– Private channels conversation
– Private channels files (create new Sharepoint site)
– Private channel settings
– Private channel tabs
Apps4.pro Migration Manager
- Connect the source and target tenant for migration in Apps4.Pro Migration Manager
- Setup the source tenant settings to migration Private Channels
- Setup the target tenant settings for new Private Channels
- Complete the migration
Step1: Connect the source and target tenant for migration in Apps4.Pro Migration Manager
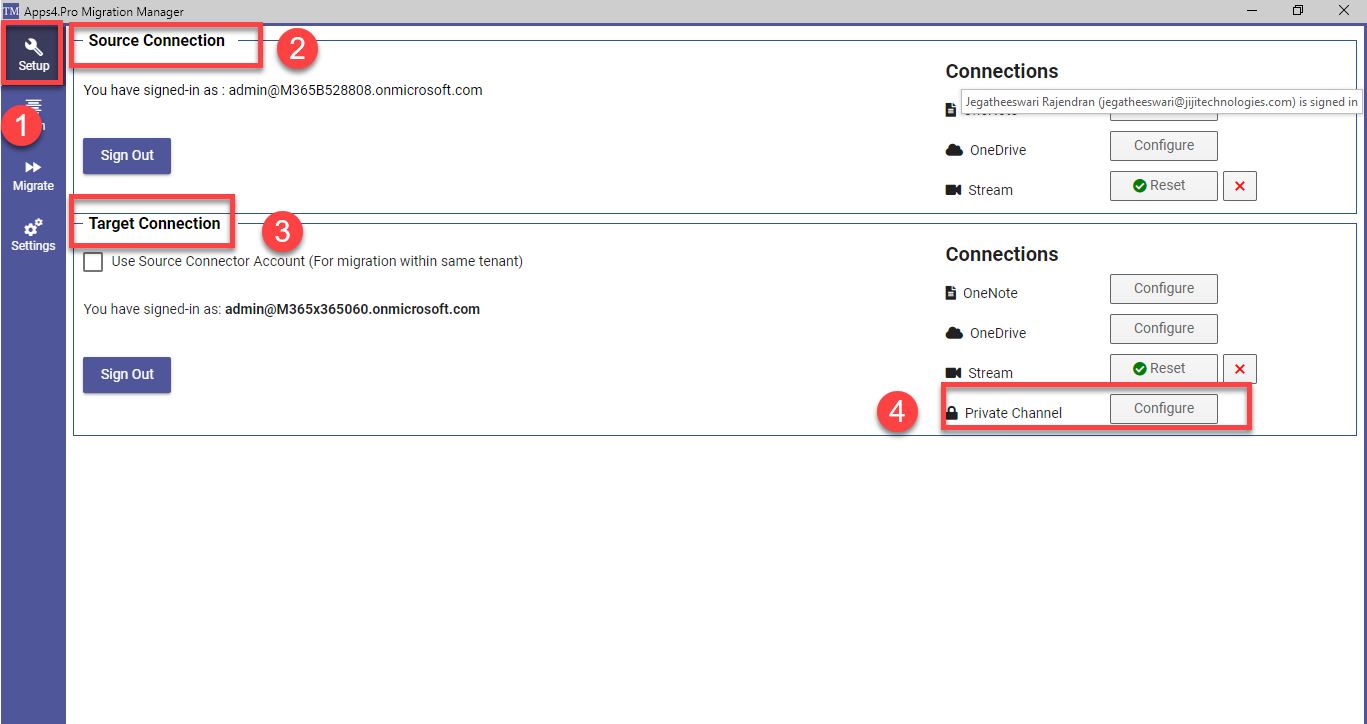
First, move to setup tab and sign in along with your account, in both source and target connection. To configure with a private channel, click configure in target private channel connections which are shown in the below image
Step 2: Setup the source tenant settings to migration Private Channels:
In this setting, you can select the Teams which you wish to migrate, you can also choose multiple teams to migrate, and you need to pick the Include Private channel option, this will include all private channels in selected teams.
Step 3: Setup the target settings for new Private Channels:
Here we will be working with settings, tabs, members to move to the other tenant with the aid of Teams settings, Channel Settings, Tab setting, User Mapping.
Teams settings:
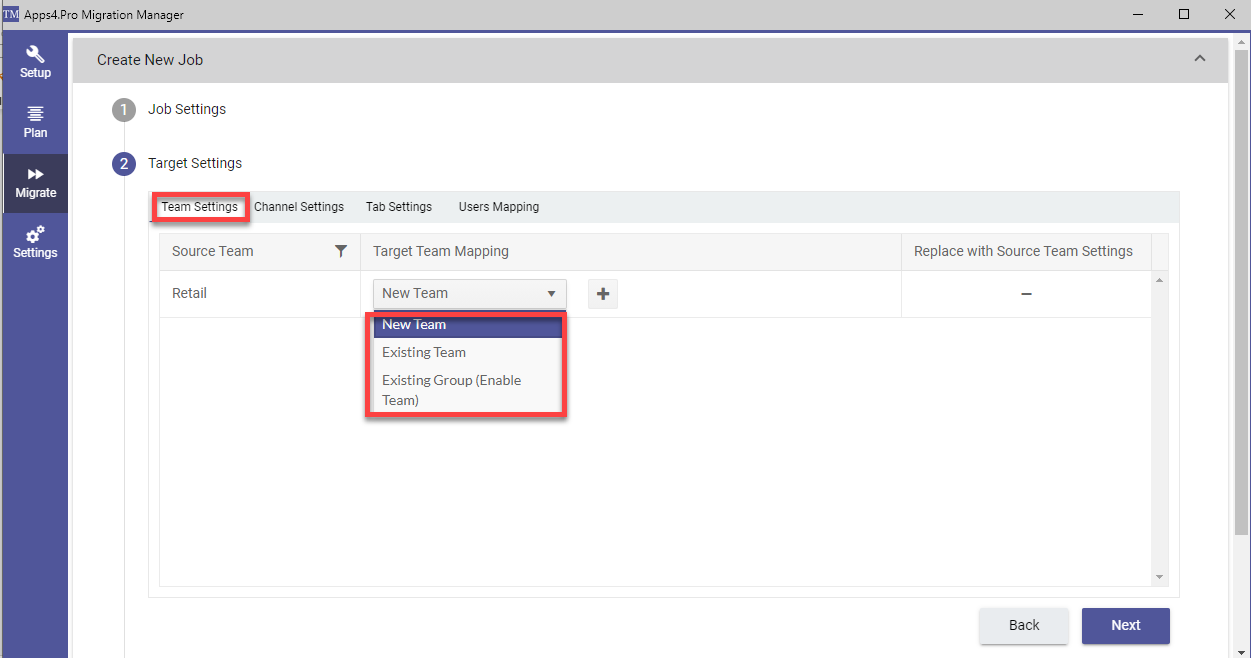
In these settings, you can decide to move the private channel to the New Team or Existing Team or Existing Group Enable.
Channel settings:
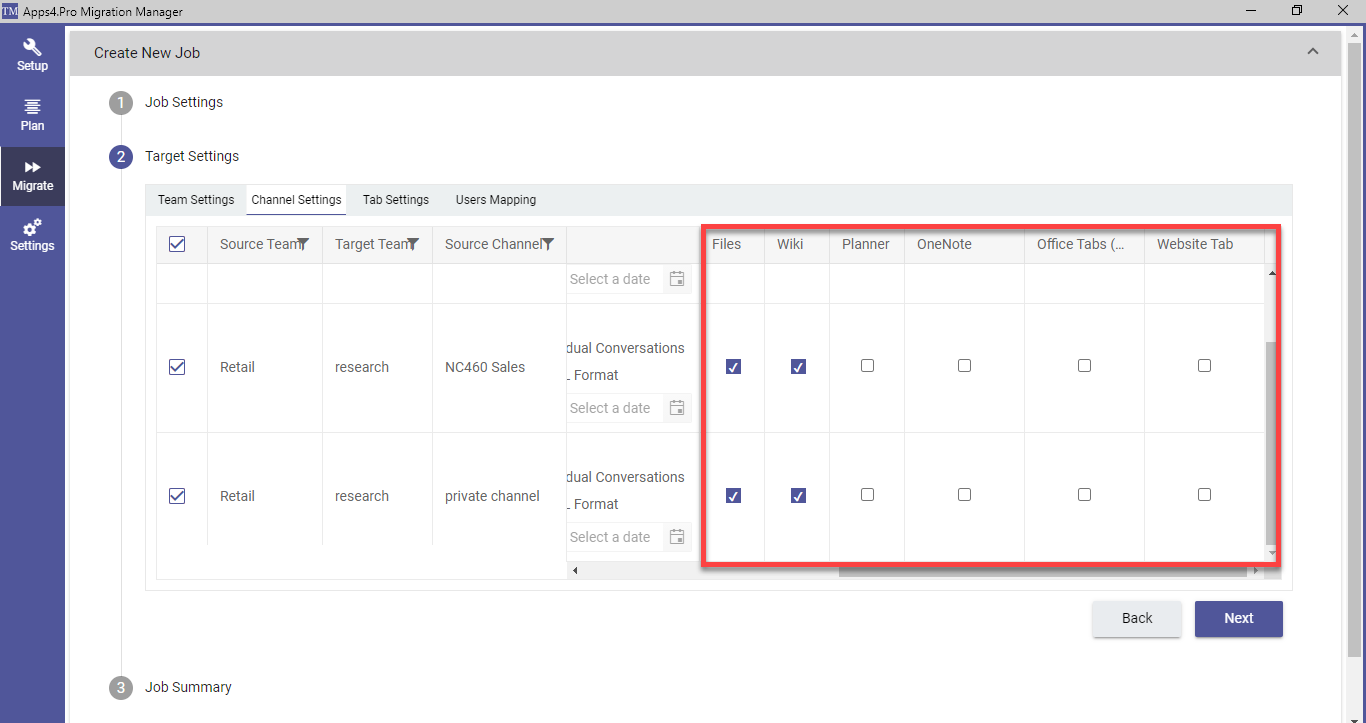
In this setting, you have a choice to work with target channel mapping, and if you want to migrate only the conversation from the exact date, then we have the option to select the Migrate date from
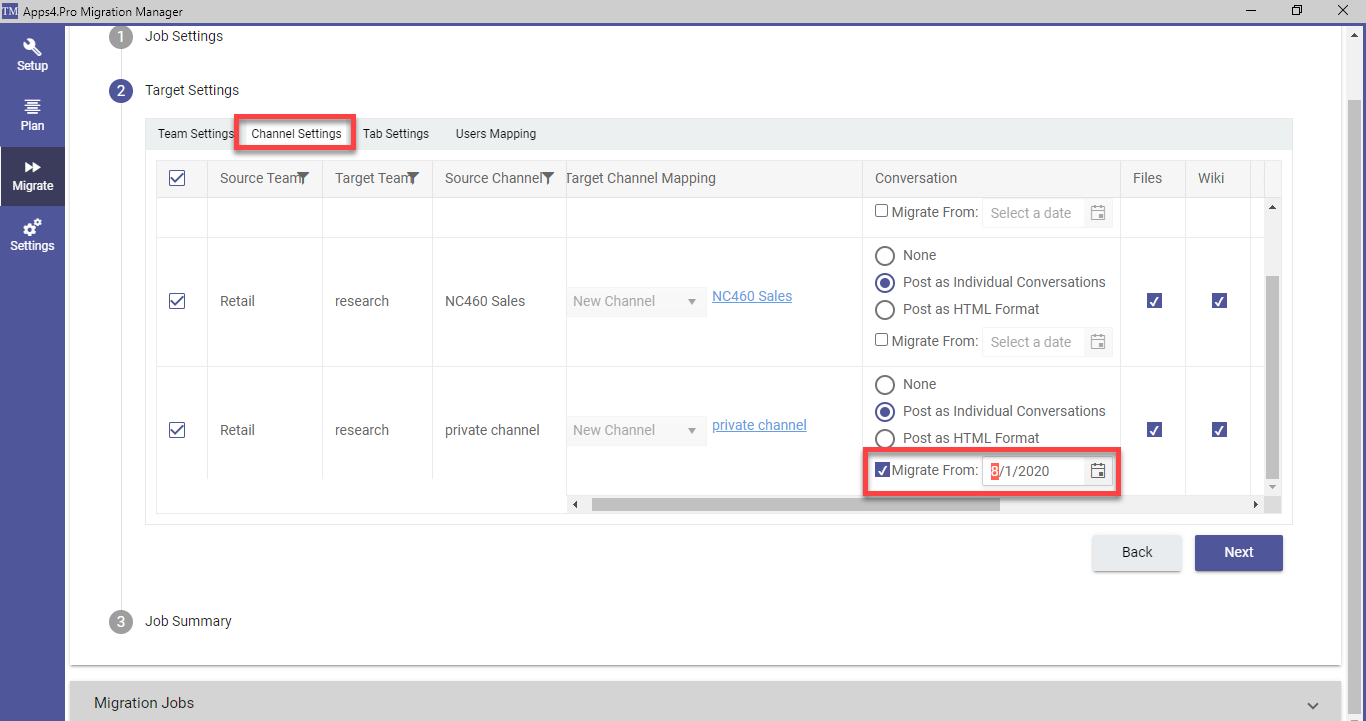
And additionally, having the possibility to select the feature that you would like to migrate to a private channel.
Tab Settings:
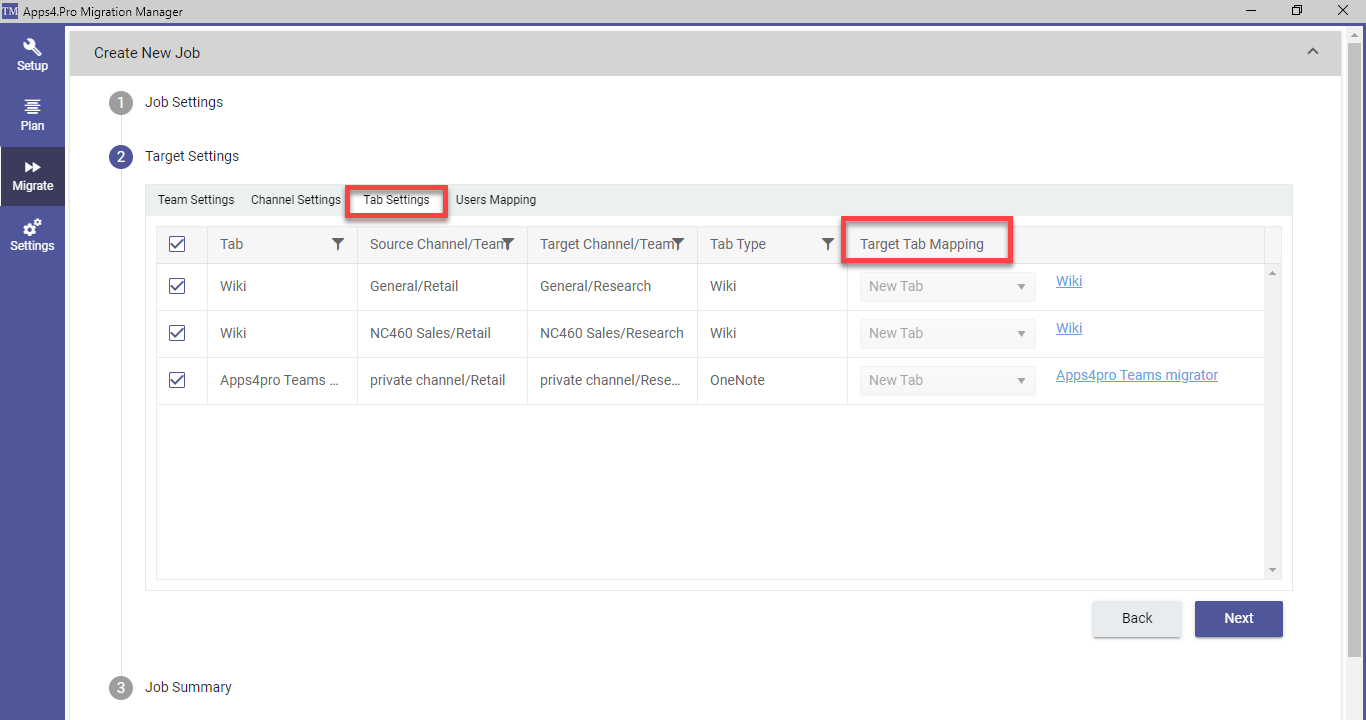
In this setting, you can work with Target Tab Mapping.
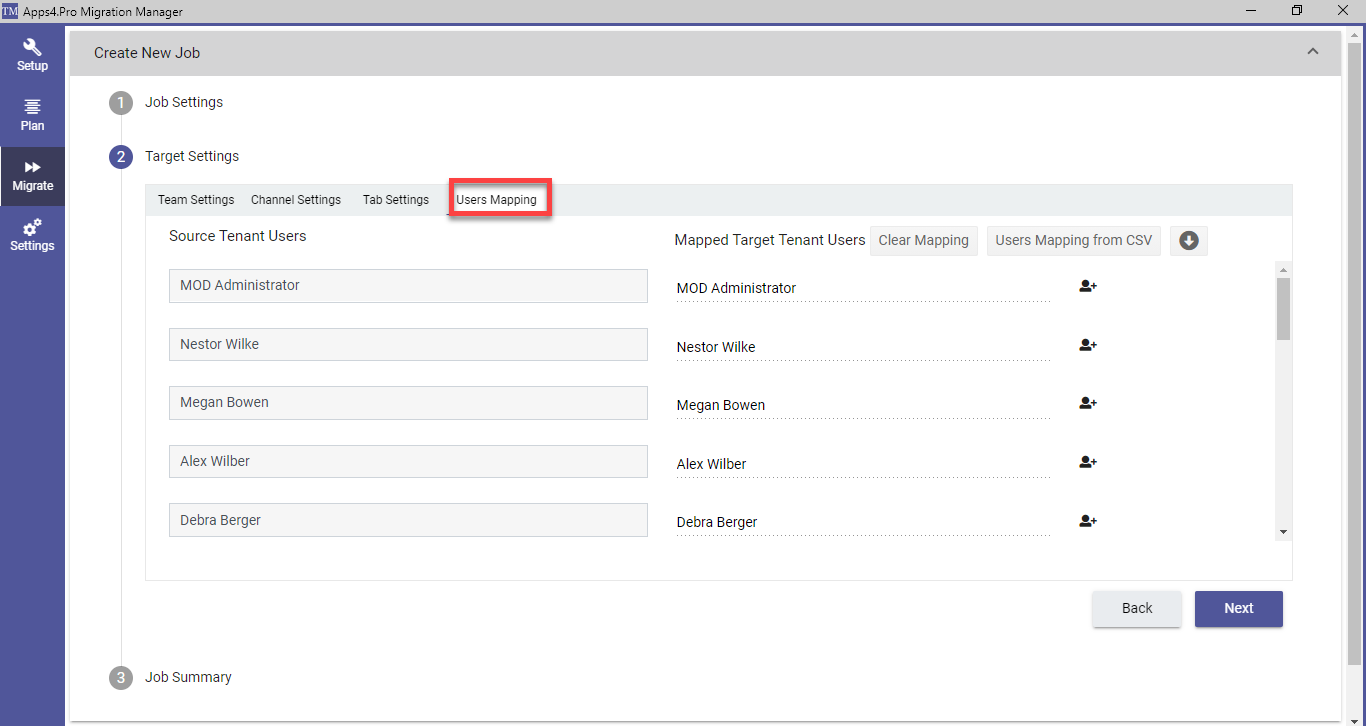
User Mapping:
In these settings, the app will map the users in the source and target based on the display names, you can similarly edit the user in target settings.
Step 4: Complete the migration:
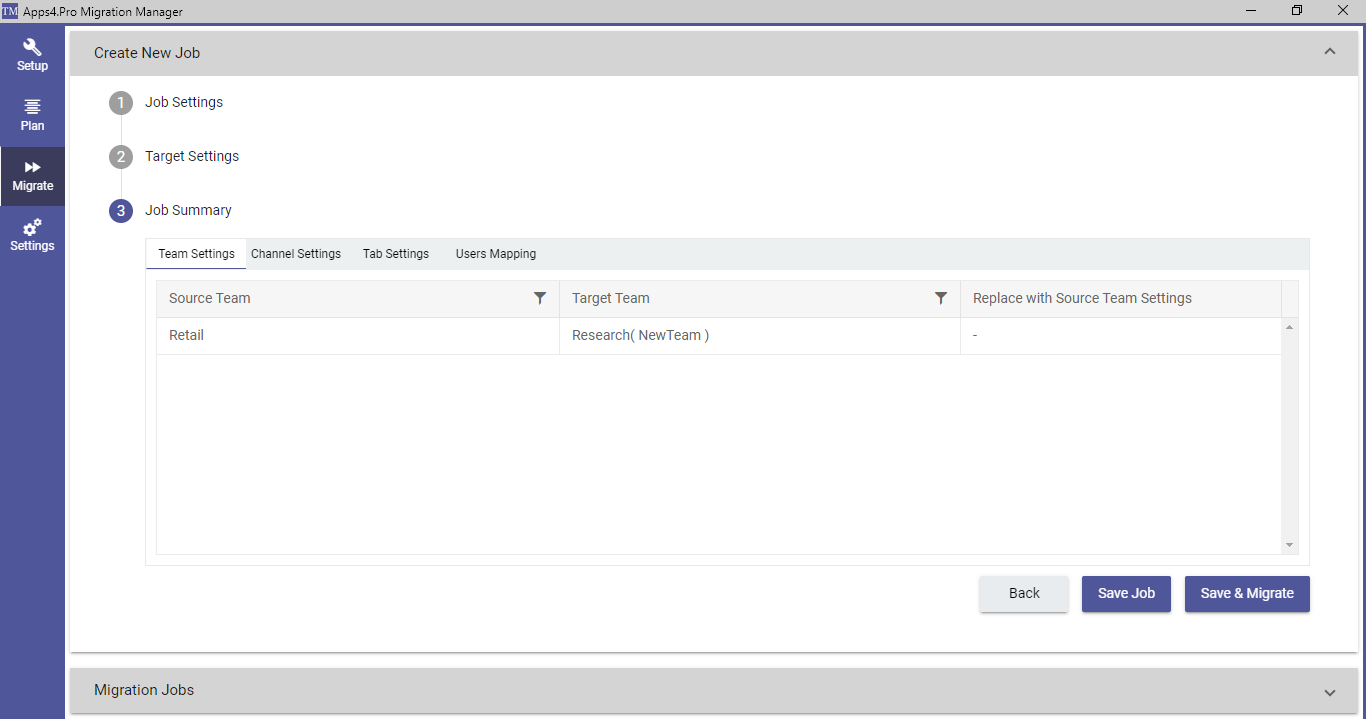
We are now in the final stage of migration, you can reassess all the settings which we have to configure before, and you can migrate immediately by simply clicking on the Save and Migrate, or if you wish, you can save the job and migrate later.
For more details please visit : https://apps4.pro/migration/microsoft-teams-migration





 Migrate
 Manage


 Migrate
 Manage