
Goodbye Repetitive Document Work
If you work with contracts, letters, proposals, or any repeatable documents, you know how draining it can be to copy an old file, tweak names and dates, and hope nothing critical is missed.
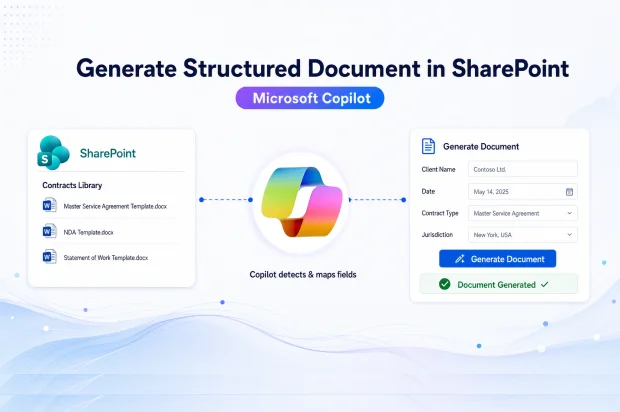
Microsoft is changing that with structured document generation in SharePoint, a new AI-powered capability that turns Word templates into guided forms so documents can be created faster, more accurately, and with far less manual effort.
Instead of hunting through a document and editing the same fields repeatedly, you simply complete a form, submit it, and let SharePoint generate a polished document for you.
This new preview feature connects SharePoint, Word, Microsoft Forms, and Microsoft 365 Copilot into a modern document creation experience that is built for scale.
What Is Structured Document Generation In SharePoint
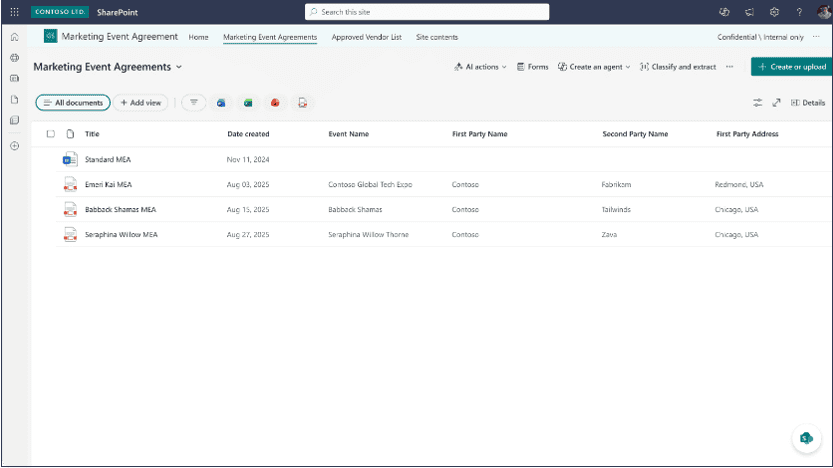
Structured document generation lets you take a Word document stored in a SharePoint library and turn it into an AI-driven form that can generate new documents in a consistent, standardized way.
When someone submits that form, SharePoint creates a new document from the original template and automatically inserts the right values into all the mapped places, while keeping the approved formatting and wording intact.
This is especially valuable if your organization relies on standard documents like contracts, offer letters, invoices, proposals, or compliance documents that must look and read correctly every single time.
Some key benefits you gain include:
- AI can automatically detect potential fields in your Word template and suggest them for your form.
- People work with a clean, user-friendly form instead of editing complex documents directly.
- Every generated document follows the same template and is stored and governed inside SharePoint with metadata.
- The whole experience fits naturally into Microsoft 365 and your existing collaboration tools.
Licensing and Requirements
Microsoft claims that people who create and configure structured document forms need a Microsoft 365 Copilot license, because they use the AI capabilities and design tools behind the scenes.
Users who only fill out the form to generate documents do not need a Copilot license; they just need access to the form and the resulting files as allowed by your organization.
A few other important requirements apply before you can use this feature effectively:
- Your source template must be a Word document in .docx format.
- Template creators must have Edit permissions on the SharePoint document library where the document template is generated.
- Admins need to opt the tenant or specific sites into the AI in SharePoint public preview phase.
How It Works End To End
Microsoft designed this feature around two practical roles in your organization: the person who creates and manages the template, and the person who fills out the form to generate a new document.
You set things up once, then your team uses the form repeatedly whenever they need a consistent, approved document.
Step 1: Turn a Word file into an AI-assisted form
This is where you turn an existing Word file into a document generation form.
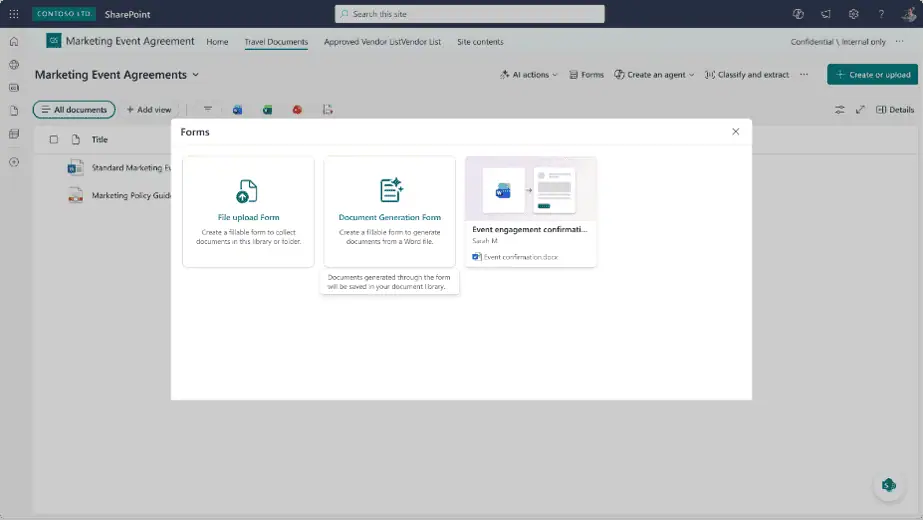
- In the SharePoint document library that holds your template, select Forms on the command bar.
- Choose Create a document generation form to start.

- Pick the Word document (.docx) you want to use as the template, either from: the current library, OneDrive, or your local device.
- SharePoint AI analyses the document structure and suggests fields such as names, dates, addresses, and responsibilities.

- Review the suggested fields and: confirm required ones, adjust names to match your terminology, check how each field maps back to locations in the document, and add any extra fields you need.


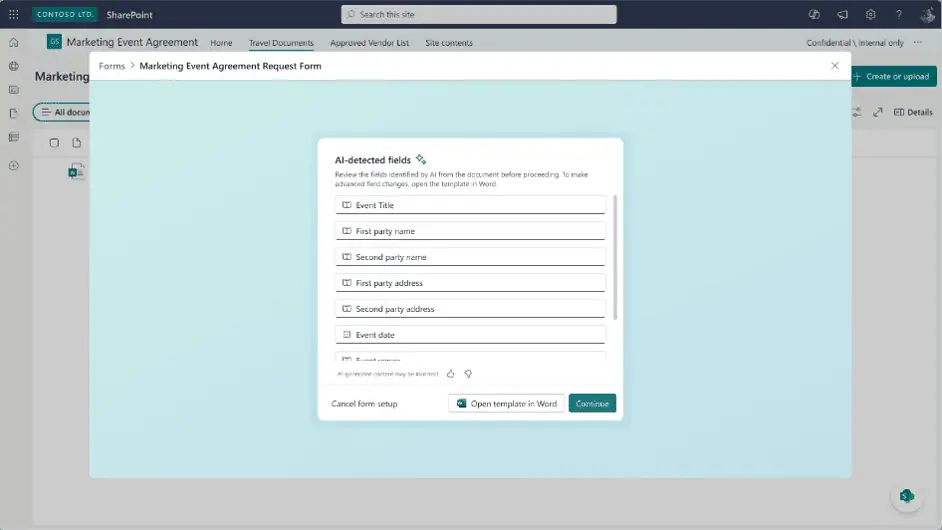
Each field shows how many times it appears in the document (for example, “1 of 3 insertions”), so you can see exactly where the values will be inserted in generated documents.
Step 2: Configure field details
Next, you configure how each field behaves and which parts of the document should show up under which conditions.
For every field, you set:
- Field name – A clear, descriptive name for the field.
- Required – Whether document authors must fill it out before submitting.
- Type – The correct data type, such as single line of text, multiple lines of text, number, date and time, hyperlink, email, choice, image, or SharePoint List lookup.


If you choose SharePoint List as a type, you map the field to a list column and can allow manual input as well.
Step 3: Configure Conditional sections inside Word
Open the template in Word, to set up conditional sections to control which parts of the template appear based on the values entered in the form.
- In the Manage templates pane go to Conditional sections and select + New.
- Give the conditional section a name such as “Country specific clauses.”
- Under Set up condition, choose the field to evaluate, pick a rule such as exact match or contains, and enter the value to match.
- Use And or Or if you need multiple conditions.
- Select Map and tie that condition to one or more sections in the document content.

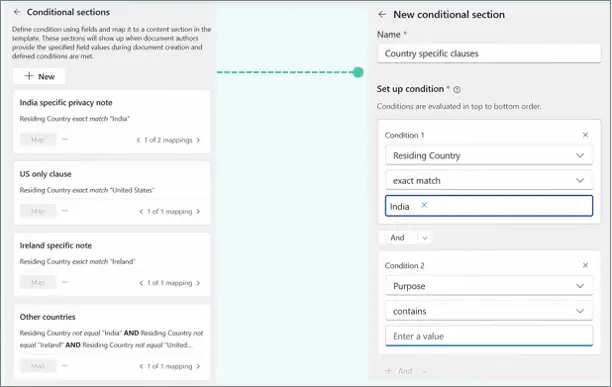
You can create multiple conditional sections, for example separate rules for India specific privacy text, US only clauses, and other countries, all in one template.
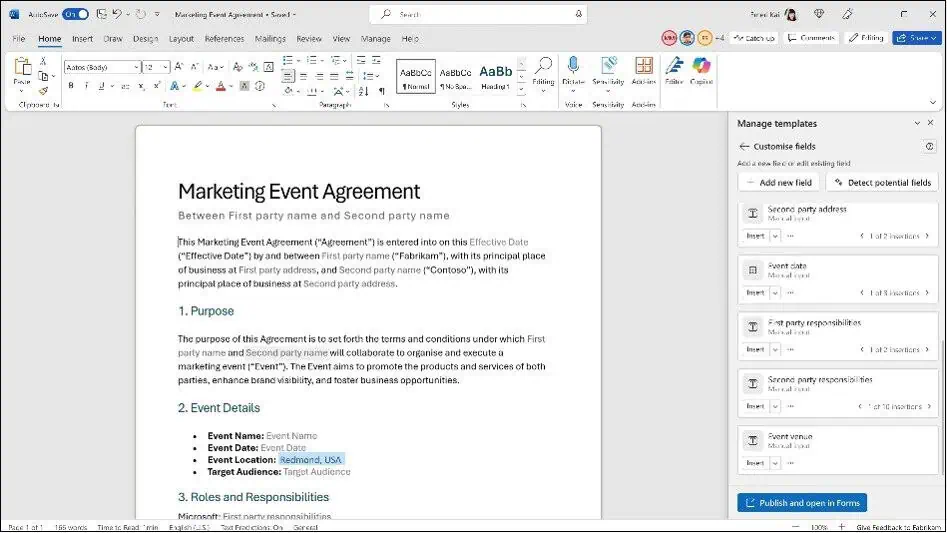
Step 4: Customise the template
You can further customize the template from Word under the Manage templates pane.
- In Manage templates pane >> Customise fields, you can add new fields, run Detect potential fields again to let AI scan for more, and use Insert on each field to place it exactly where it should appear in the document.
- Use the … menu on each field to rename it, update help text, or delete it if no longer needed.
- Define or adjust conditional sections so the right content shows up based on field values.
- When you finish, select Publish and open in Forms. Word closes the template and returns you to the form view in SharePoint with those changes applied.
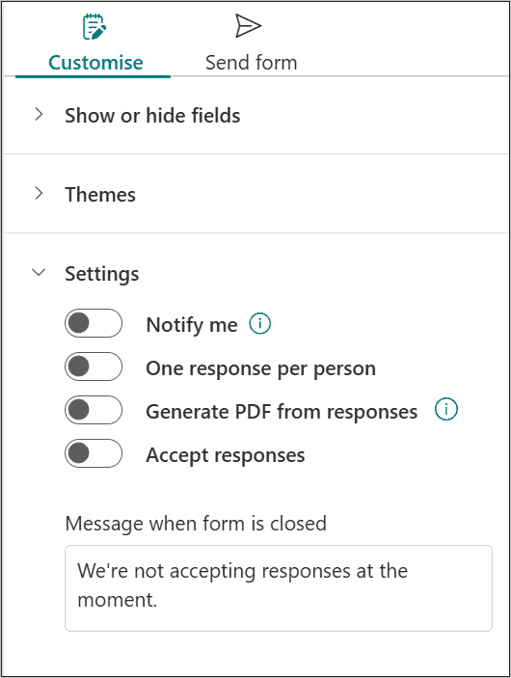
Step 5: Customize the form in SharePoint
Once the template is published, the form opens in SharePoint with a customization pane that has Customize and Send form tabs.
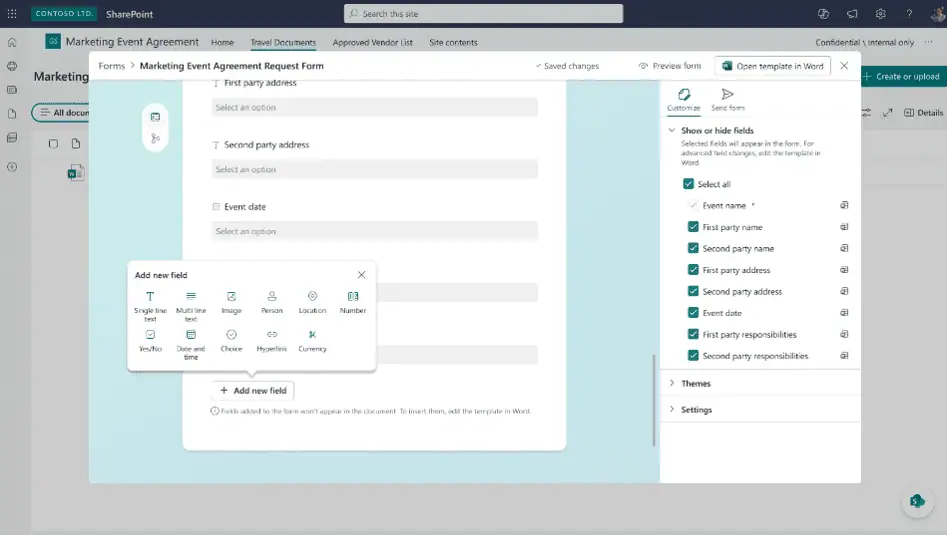
On the Customize tab you can:
- Use Show or hide fields to choose which fields appear for form submitters by checking or unchecking them. Structural field changes still happen in Word, but visibility is controlled here.
- Expand Themes to update the look and feel of the form.
- Expand Settings to configure:
- Notify me to get alerts when a form is submitted.
- One response per person to restrict multiple submissions.
- Generate PDF from responses where supported.
- Accept responses to turn the form on or off.
- Message when form is closed to customize the message users see if submissions are disabled.

Step 6: Share the form link
After customizing, you share the form so people can start generating documents.
- Switch to the Send form tab in the customization pane.

- Copy the form link and share it through Microsoft Teams, Outlook, SharePoint agents, or directly on SharePoint site pages.

The form link is persistent, so the URL stays the same even when you update and republish the template. Submitters always see the latest published version without needing a new link.
Step 7: Fill out and submit the form
For content consumers, the process is intentionally simple.
- Open the form link from wherever it was shared. A browser-based form opens.
- Fill in the requested fields. Icons indicate data types and required fields are clearly marked.
- Select Submit to generate the document.
Behind the scenes, SharePoint merges the submitted values into the template and produces a professionally formatted document without any manual editing.
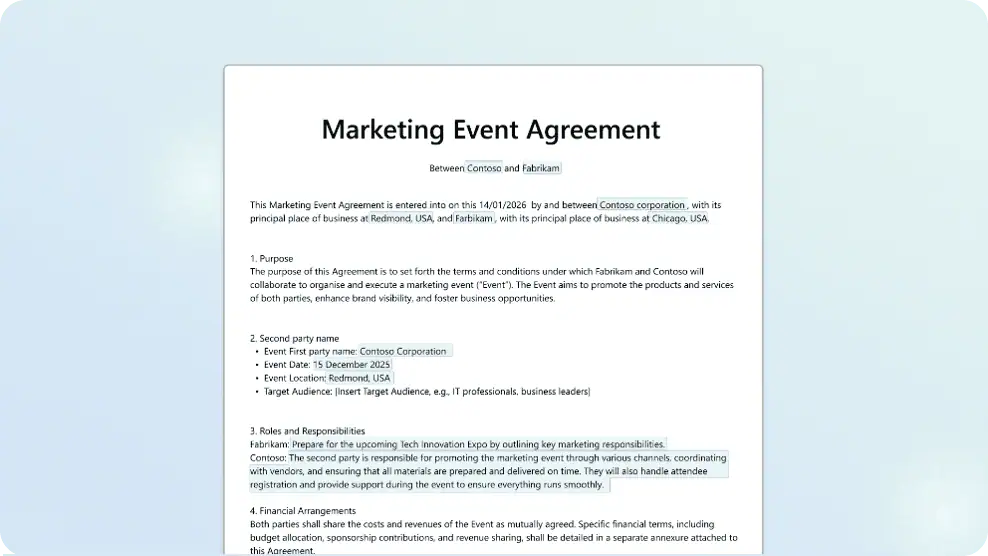
The generated file is stored in the configured SharePoint document library, and metadata from the form automatically populates the library columns.
Since documents are generated and stored directly in SharePoint,
- You benefit from the platform’s existing strengths in document management, security, and governance.
- You maintain control over permissions, versioning, retention, and sensitivity labels in the same way you do for other SharePoint content.
Step 8: Manage generated documents
All generated documents are stored in the SharePoint library that was linked to the form.
- Go to that library and open the folder associated with the form to see each generated document.
- Use the metadata filled from the form (names, dates, identifiers, and more) to sort, filter, and search documents at scale.
Step 9: Automate with Power Automate
From there, you can add automation with Power Automate and SharePoint rules:
- Trigger flows when a Form submitted (Preview) event occurs.
- Use Get form metadata (Preview) to understand the form structure in your flow logic.
- Call Generate document from form (Preview) to create documents from other business events and save them into SharePoint.
This lets you build complete workflows such as automatic notifications, approvals, routing, and system integrations around your structured document generation process.
Images Courtesy: Generate structured documents in a SharePoint document library – SharePoint in Microsoft 365
Real-World Scenarios And Use Cases
This new capability is designed for the everyday document scenarios that keep many departments busy but often rely on manual, repetitive work.
It is particularly effective in environments where accuracy, consistency, and compliance matter just as much as speed.
Typical use cases include:
- HR and people operations: Offer letters, onboarding packs, policy acknowledgment forms, benefits notifications, and employment or visa verification letters.
- Legal and compliance: Contracts, NDAs, statements of work, vendor and partner agreements, settlement letters, and audit reports.
- Procurement and finance: Purchase orders, invoices, approval letters, and supplier onboarding documents.
- Sales and operations: Customer proposals, bid responses, project summaries, customer letters, and compliance statements.
Wherever you see a pattern in your documents, with only certain values or sections changing, structured document generation can help standardize and speed up the process.
Limitations
There are also some current preview limitations to keep in mind:
- Only Word templates are supported for structured document generation.
- If you want to change the structure of mapped fields after publishing, you need to do that in Word and then republish.
- Form submitters do not automatically gain access to the library, so file permissions still need to be handled appropriately.
- PDF generation is not available when sensitivity labels are enabled for the site or library, although Microsoft plans to support this in a future release.
Learn More From Microsoft
To explore the feature in more detail and see Microsoft’s official guidance, check out:
- Microsoft Tech Community: Structured document generation with forms now in preview
- Microsoft Learn: Generate structured documents in a SharePoint document library