Custom Fields
Ability to create Custom Fields in Microsoft Planner is the most
requested feature by many users as it helps them to plan, deliver and monitor the tasks assigned to users easily and efficiently.
Experts suggests different concepts to manage the tasks efficiently. Almost all experts say the task details in a project should be crystal clear to all
users so they understand very well what their responsibility is and they
better perform. One such popular model is RACI Matrix, which helps users
to easily identify roles and responsibilities of them in the project.
In order to implement RACI Matrix, we need to create different custom
fields in task cards. This may vary from Plan to Plan. With the help of
Apps4.Pro Planner Manager organizations / teams can easily implement
RACI matrix in their projects and reap the benefit of simplicity in
Microsoft Planner without spending time for training and implementation.
As RACI model suggests each task should have the following details in
place.
- Responsible person for the task
- Accountable person for the task
- Consulted person for the task (Who is the subject matter expert)
- Informed to the person who is affected by the outcome of the
task.
Steps to Create Custom Fields
Now let’s deep drive on how to use Apps4.Pro Planner
Manager to create custom fields
and use across all Apps4.Pro components.
Create / Edit custom fields is supported from Apps4.Pro Planner Manager.
But these custom fields can be accessed from all Apps4.Pro components
such as Outlook Desktop add-in , Outlook Web add-in and from Planner
Manager during create or edit tasks.
First lets download and install Apps4.Pro Planner Manager from below
link
http://apps4.pro/planner-manager.aspx
After installation go to Settings > Custom Fileds. Using
Apps4.Pro you can create different set of fields for different plans. So
select the Plan from to which we need to create the fields first and
click on Add New Field button.

The Planner Manager consists of a list for the different field sets
which can be added with the tasks.
- Single / Multi line (Ex: Notes for approver)
- Date (Ex: Project deadline)
- User (Ex: Responsible person for this task)
- Options (Ex: Priority – High, Medium, Low)
- Label_Map(Ex: all active and available label)
- Time(ex: Overall Time spend for this task)
- Hours Minutes(Ex: Overall Hours with Minutes spend for this task)
- Number(Ex: Days spend for this task)

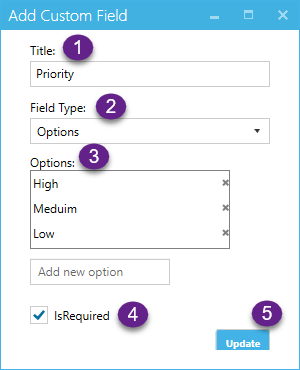
Now key in the title of the field and then select the field type. Also
check “IsRequired” checkbox to make this field mandatory so users cannot
skip this when they create or edit tasks.
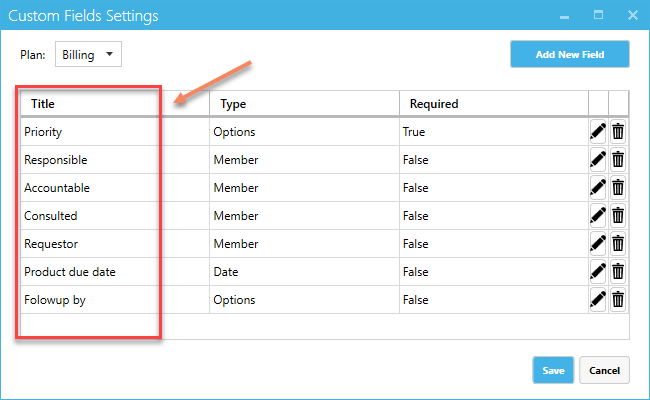
For this sample I will create the following custom fields in the project
named Billing.
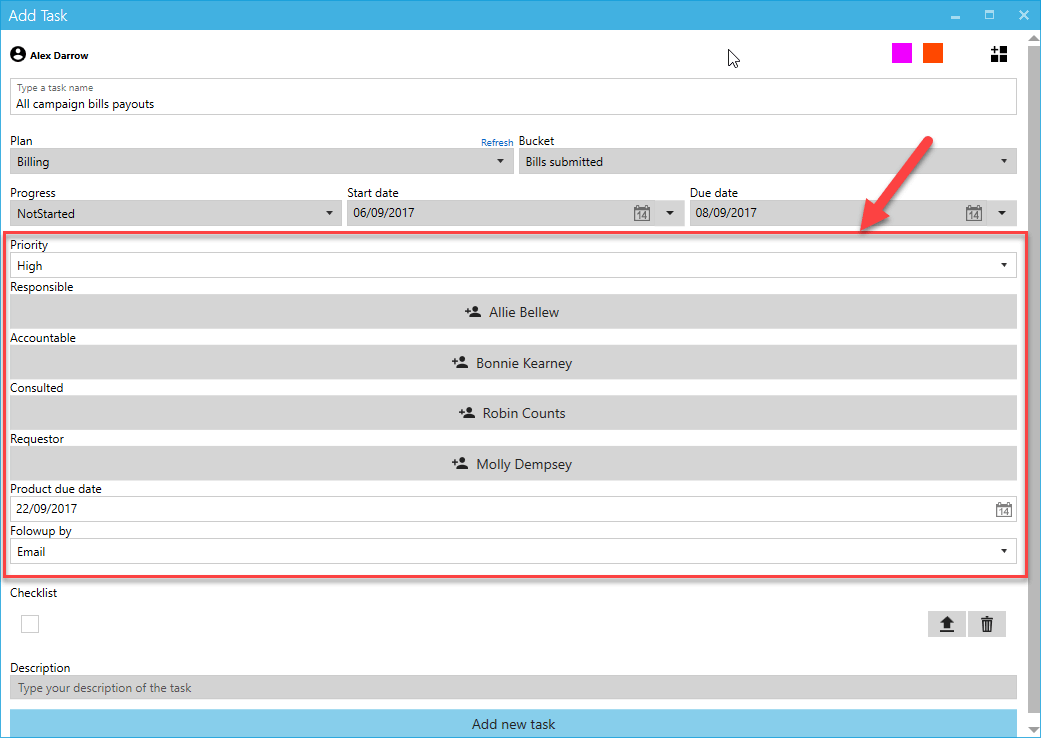
Apps4.Pro Planner Manager
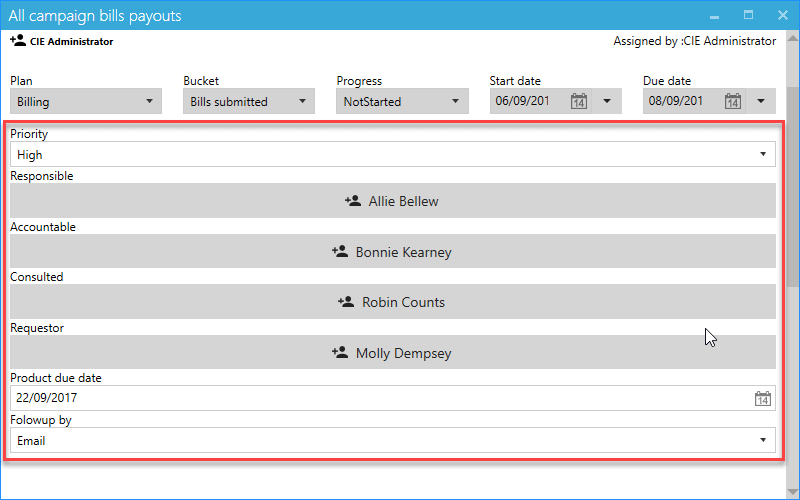
Apps4.Pro Outlook Desktop add-in
For more details visit https://apps4.pro/planner-manager.aspx








 Migrate
 Manage


 Migrate
 Manage