
Most M365 admins meet IRM the same way: someone uploads a confidential file to a SharePoint library, the team panics that it could be downloaded and forwarded, and the security team asks, “Can we make it, so this only opens for the right people, even off the network?”
IRM has been Microsoft’s answer to that question for over a decade. It still works, and you’ll still find it in plenty of tenants. But Microsoft 365 has quietly moved beyond it. Sensitivity Labels (now part of Microsoft Purview Information Protection) carry the same idea further, cover more workloads, and tie protection to the content itself rather than to the library or list it lives in.
This guide explains what IRM actually does, where it still fits, why Microsoft 365 has shifted to Sensitivity Labels, and what happens to all of that protection when you migrate from one tenant to another.
- What Is Information Rights Management?
- How IRM Works in SharePoint
- Sensitivity Labels: The Modern Microsoft 365 Approach
- Why Organizations Are Adopting Sensitivity Labels
- Sensitivity Labels and IRM in a Tenant-to-Tenant Migration
- How Apps4.Pro Helps Preserve Information Protection During Migration
- Where to Go From Here
What Is Information Rights Management?
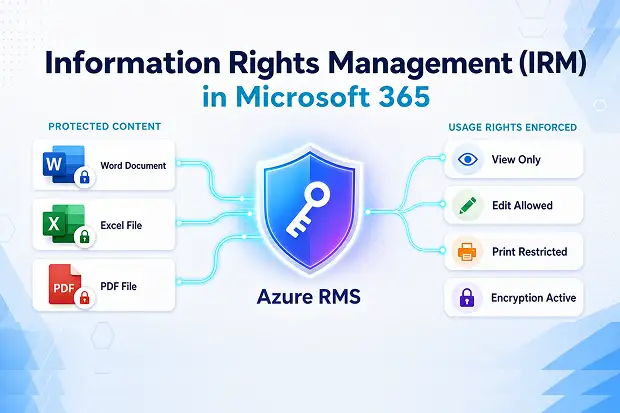
Information Rights Management is a Microsoft technology that protects files by encrypting them and embedding usage restrictions that stay with the document. Even if someone downloads or emails a protected file, IRM controls what they can do with it: view, edit, print, copy, forward, or open at all.
In Microsoft 365, IRM is delivered through the Azure Rights Management Service (Azure RMS), the cloud successor to the on-premises Active Directory Rights Management Services (AD RMS). When you turn IRM on for a SharePoint Online library, two things happen:
- Files downloaded from that library are encrypted on the way out using Azure RMS.
- Usage rights (configured in the library settings) are bound to the file: who can open it, for how long, and what they can do with it once open.
The protection enforces wherever the file goes. Open a downloaded IRM-protected Word file on a personal laptop a year later, and Word still calls Azure RMS to check the user’s permissions before showing the content.
How IRM Works in SharePoint
SharePoint IRM is enabled in two places : once at the tenant level by a SharePoint or global admin, then per library or list by site owners. The tenant-level setting is the one most admins struggle to find, because it now lives on the classic settings page in the SharePoint admin center, not the modern UI.
Step 1 — Enable IRM at the Tenant Level
One-time setup by a SharePoint or global admin.
- Confirm Azure Rights Management is activated for your tenant. In the Microsoft 365 admin center, go to Settings → Org settings → Microsoft Azure Information Protection and activate if it isn’t already.
- Open the SharePoint admin center.
- In the left nav, click Settings, then scroll to the bottom and click classic settings page. (This is the step most admins miss ; IRM does not appear in the modern Settings UI.)
- Scroll to the Information Rights Management (IRM) section.
- Select Use the IRM service specified in your configuration, then click Refresh IRM Settings.
- Allow up to an hour for the change to propagate before the IRM option appears in library settings.
Licensing requirement: IRM needs Azure Rights Management, which is included in Microsoft 365 E3, E5, A3, A5, and Business Premium, or as an Azure Information Protection P1/P2 add-on. It is not included in SharePoint Online Plan 1 or Plan 2 standalone, Microsoft 365 Business Basic, or Business Standard. If the IRM section doesn’t appear on the classic settings page, the tenant most likely doesn’t have a SKU with Azure RMS.
Step 2 — Enable IRM on a Library or List
Per library, by the site owner, after Step 1 has propagated.
- Go to the library → Settings → Library settings → More library settings → Information Rights Management (under Permissions and Management).
- Tick Restrict permissions on this library on download.
- Set a policy title and description (these appear when users open a protected file).
- Configure the usage rights:
- Allow viewers to print documents
- Allow viewers to run scripts and screen reader programs
- Allow viewers to write on a copy of the document
- Group protection (limit access to specific groups)
- Set an expiration date for the document license
- Allow viewers to print documents
- Decide whether to apply restrictions on upload as well.
Once enabled, when a user downloads a file from that library, SharePoint passes the request to Azure RMS, which encrypts the file with the configured restrictions and returns it. The encrypted file can only be opened by an application that supports RMS, primarily Word, Excel, PowerPoint, Outlook, and RMS-aware PDF viewers.
Supported File Types
IRM in SharePoint Online supports a defined set of file formats:
- Office documents: .docx, .xlsx, .pptx, .docm, .xlsm, .pptm, plus older 97-2003 binary formats
- PDF files (with an RMS-aware reader)
- XPS files
- Selected image formats through the RMS sharing app
Files that aren’t on the supported list either can’t be uploaded (if you enable that restriction) or are stored without IRM protection.
Where IRM Falls Short
IRM does one job well (encrypt-on-download from a SharePoint library) but it has clear limits:
- Library-scoped, not content-scoped. Move a file out of the IRM-enabled library, and the library-level IRM policy no longer applies to future downloads from the new location.
- Limited workloads. IRM applies to SharePoint, OneDrive, and Exchange (for protected email) only. It doesn’t follow content into Teams chats, Loop components, or Power BI.
- No content-based classification. IRM doesn’t know what’s in a file. It treats every file in the library the same way.
- No visual marking. No watermarks, headers, or footers on protected documents. Users can’t tell a file is protected until they open it.
- No auto-classification. You can’t tell IRM to protect anything containing a credit card number or a customer record. It’s all-or-nothing at the library level.
These gaps are exactly what Sensitivity Labels were built to close.
Sensitivity Labels: The Modern Microsoft 365 Approach
Sensitivity Labels are Microsoft 365’s current strategic answer to information protection. They live in Microsoft Purview Information Protection (formerly Azure Information Protection) and replace the old “label + protect” workflow with a single, integrated model.
A sensitivity label is a tag you apply to content: a document, an email, a Teams meeting, a SharePoint site, a Microsoft 365 group, a Power BI report, a Fabric item. Each label carries a set of actions Microsoft 365 enforces wherever that content travels.
What a Sensitivity Label Can Do
A single label can apply any combination of:
- Encryption — using cloud-based or customer-managed keys, with full Azure RMS usage rights.
- Content marking — headers, footers, and watermarks (e.g., “Confidential — Do Not Forward”).
- Endpoint DLP integration — Microsoft Purview DLP policies can target labelled content directly.
- Site and group protection — control privacy, external sharing, and device access on labelled SharePoint sites, Teams, and M365 groups.
- Auto-labelling — apply a label automatically when content matches a sensitive information type (credit cards, national IDs, custom patterns).
- Default labels for SharePoint document libraries — newly uploaded files inherit the library’s default label.
- Container labelling — label a Teams or a SharePoint site, and the privacy and sharing controls flow to everything inside.
IRM vs Sensitivity Labels at a Glance
Capability | Classic IRM | Sensitivity Labels |
|---|---|---|
Scope | Library or list | File, email, site, group, container |
Protection travels with the content? | Only files downloaded from the protected library | Yes, protection embedded in the file itself |
Visual markings (headers, footers, watermarks) | No | Yes |
Auto-classification by content | No | Yes (sensitive info types, trainable classifiers) |
Coverage | SharePoint, OneDrive, Exchange | Office apps, SharePoint, OneDrive, Exchange, Teams, Purview DLP, Fabric, Power BI |
Coauthoring on protected files | Limited | Yes (with SharePoint and OneDrive sensitivity label support enabled) |
Search, eDiscovery, DLP inside encrypted files | No | Yes (when content is labelled in Office for the web) |
External user access to protected content | Limited | Yes (via guest accounts) |
Auditing | Basic | Three dedicated audit events : Applied, Changed, Removed sensitivity label |
The short version: IRM is library protection. Sensitivity Labels are content protection that follows the content.
Enabling Sensitivity Labels for SharePoint and OneDrive
To get the full Sensitivity Label experience inside SharePoint and OneDrive, tenants need to enable the integration:
Connect-SPOService -Url https://<tenant>-admin.sharepoint.com # Enable sensitivity labels for Office files in SharePoint and OneDrive Set-SPOTenant -EnableAIPIntegration $true # Optionally enable for PDFs Set-SPOTenant -EnableSensitivityLabelForPDF $true |
After enabling, allow about 15 minutes for tenant-level changes to take effect, and at least an hour before testing with a small group. SharePoint Online Management Shell version 16.0.19418.12000 or later is required.
Once enabled, SharePoint and OneDrive can process the contents of encrypted labelled files. That’s what unlocks coauthoring, eDiscovery, DLP, search, and external guest access on protected content, none of which classic IRM supports.
What Sensitivity Labels Don’t Cover
A few configurations still aren’t supported, even with the integration enabled:
- Labels using on-premises (HYOK) keys or Double Key Encryption
- Labels with user-defined permissions (the “let users assign permissions” option), which create files that can’t be coauthored in Office for the web and often block automated migration paths
- Labels with User access to content expires set to anything other than Never
- Labels configured for trainable classifiers in auto-labelling : only sensitive information types work in Office for the web
For the highest-risk content, IRM-style library protection or Double Key Encryption still has a place. For everything else, Sensitivity Labels are the path Microsoft is investing in.
Why Organizations Are Adopting Sensitivity Labels
Three reasons keep showing up in enterprise migration projects:
- One protection model across the whole stack. Label a file, and the same protection rules apply in Word desktop, Word for the web, Outlook, Teams, SharePoint, OneDrive, Fabric, and Power BI. With IRM, you have to configure each library separately.
- Protection survives the boundary. Email a labelled file to a partner, save it to a personal device, or copy it into an unmanaged tenant: the encryption and usage rights travel with it. With IRM, protection is tied to the IRM-enabled library, so the library-level policy does not automatically follow files moved outside that protected location.
- Auto-labelling closes the human gap. Most users don’t manually classify documents. Sensitivity Labels can auto-apply based on content (credit card numbers, customer IDs, custom patterns), default at the library level, or inherit from a labelled container. IRM has no equivalent.
The practical impact: organisations standardising on Sensitivity Labels can usually decommission their classic IRM configurations over time, simplifying admin overhead and giving compliance teams one model to audit.
Sensitivity Labels and IRM in a Tenant-to-Tenant Migration
This is where most teams get caught out. Sensitivity labels and IRM both look like metadata but neither moves as metadata in a cross-tenant migration. A label, encryption key, and underlying RMS template are all tenant-specific.
When you migrate files from one M365 tenant to another:
- Sensitivity labels are not recognised in the destination tenant. Each label has a unique GUID per tenant, so even an identically named “Confidential” label in the destination is a different object.
- Encryption keys don’t transfer. Files protected by Azure RMS in the source tenant can’t be decrypted by the destination tenant’s RMS service.
- IRM library settings don’t migrate. A library that had IRM turned on in the source tenant arrives in the destination without that configuration applied.
- User-defined permission labels are the worst case. Microsoft’s native cross-tenant SharePoint migration tooling explicitly blocks sites containing files with user-defined permission labels. Some third-party tools move the files but drop the protection: files arrive, but the encryption is gone.
What that means in practice: a successful file move doesn’t mean protection was preserved. A file count match doesn’t tell you whether your sensitive content is still encrypted on the other side.
What to Do Before the Cut-Over
- Inventory labels and IRM libraries in the source tenant. Cover SharePoint, OneDrive, Exchange, Teams, and container-level usage.
- Flag user-defined permission labels early. Treat them as blockers until you’ve decided whether to remediate, re-protect, or exclude.
- Recreate the label taxonomy in the destination. Same structure, same display names, same publishing logic, done before users start working in the new tenant.
- Document DLP, retention, and auto-labelling policies. Rebuild them in the destination from a baseline, not from memory.
- Validate protection outcomes, not just file presence. Sample-test that a previously encrypted file is still encrypted (and openable by the right users) in the destination.
How Apps4.Pro Helps Preserve Information Protection During Migration
Apps4.Pro Migration Manager treats Microsoft 365 as a single workload estate rather than a collection of independent tools. Exchange, Teams, SharePoint, OneDrive, Planner, Power Automate, Power BI, Forms, and Viva Engage migrate as one scope, which matters for IRM and Sensitivity Label continuity because governance signals depend on the workloads underneath them.
For tenants moving content protected by IRM or Sensitivity Labels, Apps4.Pro Migration Manager contributes to protection continuity in several ways:
- One scope across the M365 estate. Teams migrate with their associated SharePoint sites, channel files (standard, private, and shared), Planner plans, OneNote notebooks, and metadata. Sensitivity Labels and IRM policies land on a complete environment, not a half-migrated one.
- Preserved permissions, structure, and metadata. Apps4.Pro preserves site structure, metadata, and user permissions in SharePoint, files with full permissions and versions in OneDrive, and ownership in Planner and Power Automate. The access model that labels were built around still makes sense in the destination.
- Inventory reports per workload. Detailed inventory reports for Planner plans and Power Automate flows (owners, environments, connector types, plan details) give admins a baseline to verify protection-related context after cut-over.
- Incremental migration for staged label rollouts. Sync only new or changed data, useful when label remediation and rollout happens in phases rather than a single cut-over.
- ISO 27001 and ISO 27701 certified. Migration data isn’t stored outside your tenant, which matters when the content being moved is encrypted under Azure RMS or labelled with restricted permissions.
Worth knowing upfront: no migration tool can automatically transfer sensitivity label GUIDs or re-encrypt files under a destination tenant’s RMS keys, because labels and encryption keys are tenant-scoped by design in Microsoft 365. Recreating the label taxonomy and (where needed) re-applying protection in the destination is platform work, not tooling work. Apps4.Pro’s tenant migration planning guide walks through exactly how to scope this for M&A migrations, a useful companion to this article.
The principle is simple. A migration that ignores Sensitivity Labels and IRM produces files in the destination tenant that have lost their protection signal. A migration built on Apps4.Pro Migration Manager treats the workloads underneath those labels as a single scope, so the governance model has a clean, complete environment to land on from day one.
Where to Go From Here
If you’re protecting content in Microsoft 365 today, the strategic direction is clear: build on Sensitivity Labels and treat IRM as the foundation it grew out of.
For tenants already running IRM, that means:
- Inventory IRM-enabled libraries and the content they protect.
- Design a Sensitivity Label taxonomy that maps to your existing classification scheme.
- Enable Sensitivity Label support for SharePoint and OneDrive.
- Pilot with a single high-value workload (Finance, Legal, HR).
- Migrate IRM libraries onto labels in phases, decommissioning IRM library settings as labels take over.
For organisations planning a tenant-to-tenant migration , M&A consolidation, geo-relocation, or platform exit , Sensitivity Labels and IRM are pre-migration planning items, not post-cut-over cleanup. The cost of getting it wrong is files arriving in the destination tenant without the protection they had on the way out.
Apps4.Pro Migration Manager handles Microsoft 365 tenant-to-tenant migrations as one workload scope (Teams, SharePoint, OneDrive, Exchange, Planner, Power Automate, Power BI, Forms, and Viva Engage) preserving the permissions, metadata, and workload structure your sensitivity labels and IRM policies depend on. So when you rebuild the protection model on the destination side, it has somewhere clean to land.

















 Migrate
 Manage
 Migrate Microsoft 365