
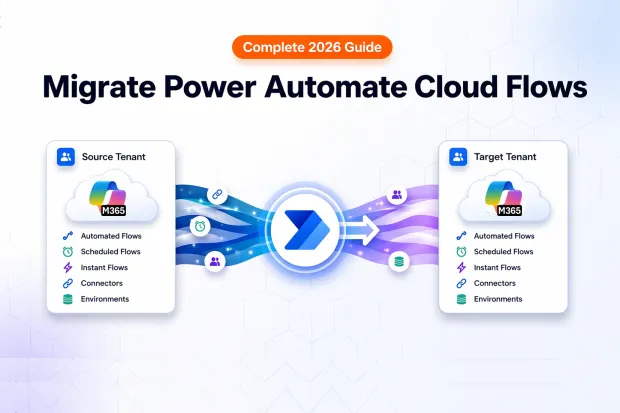
Power Automate cloud flows are among the most fragile workloads in a tenant to tenant migration. The flow logic transfers, but every connector authentication token, SharePoint URL, user identity, and environment reference is tenant-bound – none of it follows automatically.
What most migration guides miss: the three cloud flow sub-types – Automated, Scheduled, and Instant – behave differently after migration. Microsoft confirms that Instant flows become inaccessible after default environment migration, while Automated and Scheduled flows are structurally unaffected.
For the full migration framework, see our Power Automate tenant-to-tenant migration overview.
- Understanding Cloud Flow Sub-Types for Migration
- Automated Cloud Flows – Migration Behavior & Validation
- Scheduled Cloud Flows – Trigger Timing & Post-Migration Checks co
- Instant Cloud Flows – Known Limitations & Workarounds
- Step-by-Step Migration with Apps4.Pro
- Post-Migration Flow Validation Checklist
- Frequently Asked Questions
Understanding Cloud Flow Sub-Types for Migration
Not all cloud flows are equal when it comes to migration. Power Automate has three cloud flow sub-types, and each carries different risks when moving between tenants.
| Sub-Type | Trigger | Migration Risk |
|---|---|---|
| Automated | Event-driven (e.g., “When an item is created in SharePoint”) | Trigger breaks if connector references aren’t remapped |
| Scheduled | Time-based (e.g., “Every day at 8 AM”) | Trigger timing resets; schedule may not activate in new tenant |
| Instant | User-initiated (e.g., button press, “For a selected item”) | Becomes inaccessible after default environment migration |
The critical difference: Automated and Scheduled flows survive the migration structurally – they need reconfiguration, but they’re still there. Instant flows can disappear entirely from the user’s flow list after migration. If your organization uses SharePoint button flows or manual approval triggers, expect a Day 1 outage unless you prepare.
Before migrating, you need to know exactly how many of each sub-type you have, what connectors they depend on, and which users own them.
Automated Cloud Flows – Migration Behavior & Validation
Automated flows fire when a specific event occurs: a new row in Dataverse, a file uploaded to SharePoint, an email arriving in Outlook. They’re the most common cloud flow type in enterprise environments.
What Breaks
Automated flows survive the migration as objects, but their triggers fail because the event source references (SharePoint site IDs, list GUIDs, mailbox identifiers) point to the old tenant. The flow exists in the new tenant. It just never fires.
Connector authentication tokens are also tenant-scoped. Even if the trigger reference were correct, the flow can’t authenticate against the new tenant’s services without new connections.
What to Validate After Migration
- Trigger configuration: Open each flow and confirm the trigger points to the correct resource in the new tenant (new SharePoint site URL, new mailbox, new Dataverse environment).
- Connection references: Every connection reference must be reauthorized with a user account or service principal that exists in the target tenant.
- Downstream actions: If the flow writes to Teams, sends an email, or updates a list, each action’s resource reference needs to match the target tenant.
- Run history: Trigger the event manually and confirm a successful run appears in the flow’s run history.
Scheduled Cloud Flows – Trigger Timing & Post-Migration Checks co
Scheduled flows run on a defined cadence – every hour, daily at 6 AM, weekly on Monday. They power recurring reports, data sync jobs, and cleanup routines.
What Breaks
The schedule definition migrates, but the flow arrives in the new tenant in a disabled state. It won’t start running on schedule until someone manually turns it on. If you migrate 200 scheduled flows and forget to activate them, you’ll have 200 silent failures – no errors, no alerts, just processes that stop happening.
Like Automated flows, all connector references and authentication tokens break. The schedule itself may also shift if the source and target tenants are configured for different time zones.
What to Validate After Migration
- Flow status: Confirm the flow is turned On in the target tenant. Don’t assume activation happened automatically.
- Schedule accuracy: Open the trigger and verify the recurrence interval, time zone, and start time. Adjust if the target tenant operates in a different region.
- Connection references: Reauthorize every connection. A scheduled flow that activates but can’t authenticate will fail silently until someone checks run history.
- First-run confirmation: Wait for the first scheduled run and verify it completes successfully. Check the output data, not just the “Succeeded” status.
Instant Cloud Flows – Known Limitations & Workarounds
Instant flows are triggered manually. A user clicks a button in Power Apps, selects “For a selected item” in a SharePoint list, or taps a Flow button on mobile. They’re used heavily for ad-hoc approvals, quick-action menus, and user-initiated processes.
What Breaks
This is the critical differentiator: Microsoft states that Instant flows become inaccessible after default environment migration. Not broken – inaccessible. They disappear from the user’s available flows. Automated and Scheduled flows are unaffected by this specific behavior.
This happens because Instant flows are tightly coupled to the default environment context. When the default environment migrates, the binding between the Instant flow and the user interface element (SharePoint menu, Power Apps button, Flow mobile) severs.
Important:
Microsoft documents this behavior specifically for default environment migrations. In cross-tenant scenarios, the same risk applies when the default environment is part of the move.
Workarounds
- Pre-migration export: Before migration, export every Instant flow as a package or add it to a Dataverse solution. This gives you a portable copy to reimport in the new tenant.
- Recreate in target: For simple button flows, it may be faster to recreate them directly in the target tenant rather than troubleshoot import failures.
- Convert to Automated where possible: If the Instant flow’s real purpose is responding to a list item change, consider converting it to an Automated flow triggered by “When an item is created or modified.” This removes the Instant flow limitation entirely.
- Solution-aware deployment: Flows added to Dataverse solutions before migration have better portability. Microsoft recommends using solutions over the legacy export method.
Critical Pre-Migration Step
Run a full inventory to identify every Instant flow in your environment. Tag each one with its trigger type (button, “For a selected item,” Power Apps) and the owner. Any Instant flow not accounted for before migration will be inaccessible afterward with no straightforward recovery path.
Step-by-Step Migration with Apps4.Pro
Apps4.Pro Migration Manager handles the tenant-side migration work – discovering flows, mapping connectors and identities, and transferring flow definitions in bulk.
Step 1 – Run the Flow Inventory Report
Before touching anything, generate a complete inventory:
- All cloud flows across users and environments
- Flow sub-type (Automated, Scheduled, Instant)
- Owner and co-owner details
- Connectors used by each flow
- Enable/disable status
Apps4.Pro generates this inventory as a downloadable report even in the free trial. Use it to identify which flows are critical, which can be retired, and which Instant flows need special handling. For the full setup walkthrough, see our Power Automate migration guide.
Step 2 – Configure User and Group Mapping
Map every source tenant user and group to their target tenant equivalent. This is essential for:
- Preserving flow ownership
- Maintaining co-owner and shared-with permissions
- Ensuring connection references resolve to valid users
In M&A scenarios where usernames change (e.g., user@companyA.com → user@companyB.com), this mapping prevents every flow from becoming orphaned.
Step 3 – Configure Connector Mapping
Map source connectors to their target tenant equivalents:
- SharePoint source site → SharePoint target site
- Outlook source mailbox → Outlook target mailbox
- Teams source channel → Teams target channel
This is where most manual migrations fail. A flow with 8 actions touching 4 different connectors needs all 4 mapped correctly – one missed mapping and the flow breaks at runtime. For connector-specific issues and edge cases, see our connector migration guide.
Step 4 – Select and Migrate Flows
Select flows from the inventory and initiate migration. Apps4.Pro handles:
- Transferring flow definitions with metadata (descriptions, tags, run history references)
- Applying user and connector mappings automatically
- Preserving enable/disable status and ownership
- Migrating in bulk across multiple users and environments simultaneously
Step 5 – Activate and Validate
After migration completes:
- Verify flows appear in the target tenant.
- Check that ownership and sharing permissions are correct.
- Activate Scheduled flows (they arrive disabled).
- Reauthorize any connections that require interactive consent.
- Test each flow type per the validation checklist below.
Migrating Power Automate flows between tenants? Apps4.Pro flags every Instant flow at risk, maps connector references across all three sub-types, and lets you validate before cutover – so you’re not rebuilding flows one by one.
Post-Migration Flow Validation Checklist
Use this checklist for every migrated flow. A flow that shows “Succeeded” in the designer may still fail at runtime if a single connection reference is stale.
All Flow Types
- [ ] Flow appears in the target tenant under the correct owner
- [ ] Co-owners and shared-with permissions are intact
- [ ] All connection references show “Connected” (not “Fix connection”)
- [ ] Environment variables point to target tenant values
- [ ] No DLP policy violations in the target tenant block the flow’s connectors
Automated Flows
- [ ] Trigger event source references the correct target tenant resource
- [ ] Trigger the event manually and confirm a run starts
- [ ] Verify run completes with expected output
- [ ] Check that downstream actions (email, Teams post, list update) execute correctly
Scheduled Flows
- [ ] Flow status is On
- [ ] Recurrence interval, time zone, and start time are correct
- [ ] Wait for first scheduled run and confirm success
- [ ] Validate output data, not just run status
Instant Flows
- [ ] Flow appears in the SharePoint menu / Power Apps button / Flow mobile
- [ ] User can trigger the flow from the expected UI surface
- [ ] Run completes with expected output
- [ ] If the flow was inaccessible, confirm the reimport or recreation is functional
Week-One Monitoring
- [ ] Monitor run history daily for the first week
- [ ] Watch for intermittent authentication failures (token expiry on reauthorized connections)
- [ ] Confirm scheduled flows maintain their cadence after the first 3–4 cycles
- [ ] Check flow analytics in the Power Platform admin center for error rate spikes
Frequently Asked Questions
Automated flows trigger on events, Scheduled flows run on a time-based cadence, and Instant flows require manual user action. Automated and Scheduled flows survive structurally but need connector remapping. Instant flows become inaccessible and require export/reimport or recreation.